Tissue Paper Hot Air Balloon Construction and Launching

Tissue paper hot air balloons are one of those powerful STEM learning experiences that lend themselves so well to being cross-curricular.

IMG_0721There are the construction aspects that include measurement (length & angles for example) and skills like cutting with scissors precisely, gluing and following directions. Making mistakes, learning from those mistakes and moving on (messy learning). Collaboration, since in the classroom students usually construct the balloons in pairs or small groups. The engineering design process since as students launch their balloons they can note design changes that would lead to an improved design, make changes and relaunch to check results, and so much more. Oh, and yes, one of my favorites, there are artistic design aspects as well.  LEFT: Tissue paper balloon launch from 2013. Note the excitement of the kindergarteners as they chase it down! At this age teachers sometimes choose to construct a “class balloon” or two or three (but certainly more at times). Classes sometimes “buddy” as well – a 5th grade and a 1st grade for example.


Link to PDF of construction steps – also includes different sizes of tissue paper – we used 20 x 26 inch (51cm x 66cm) paper in videos below because it is what you usually find.

MATERIALS – So, what’s required for construction?

For EACH balloon:

– 18 sheets of 20 x 26 inch (51cm x 66cm) tissue paper (or note other size possibilities in PDF linked above) (100 sheet packs are around $12)

– scissors,  meter stick, protractor, marker, glue stick (during construction you will use the entire stick),

Here’s the video of what you would expect to get done during the first class period – about 45 to 60 minute period.

Part 1 – below

Day 2 directions below – again, expect a typical class period more or less:

Day 3 directions below:

Day 4 directions below:


OK, so you have a finished balloon (or balloons perhaps) – how do you launch them? Here are the directions to make the launcher you see used in the video.

Materials:

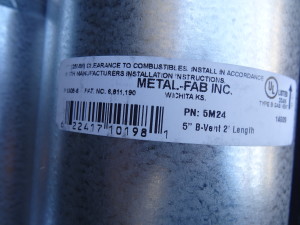
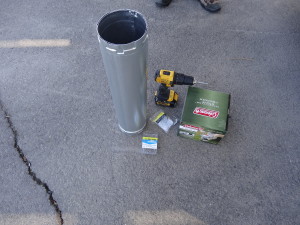
– (1) – 5 inch x 2 foot double wall stovepipe – from hardware store – about $12

DSC02874


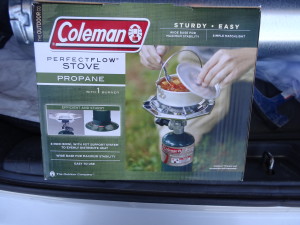
– (1) – Coleman (or other brand) propane 1 burner stove – about $35

DSC02875


– (1) – Propane tank (see in photo above of stove)

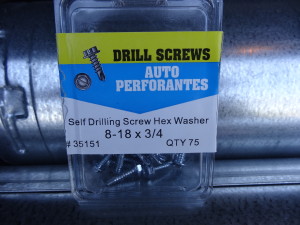
– (4) – 8-18 x 3/4 self drilling screws (box shown has 75 screws, but you only need 4)

DSC02876


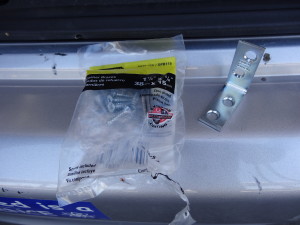
– (2) – 1 1/2 inch x 5/8 inch corner braces (pack in photo includes screws – BUT THEY ARE NOT THE ONES YOU USE)

DSC02877


– (1) – drill with screwdriver bit for driving screws. (see it in photo with other materials)

DSC02879


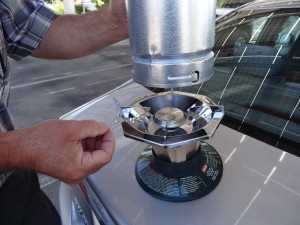
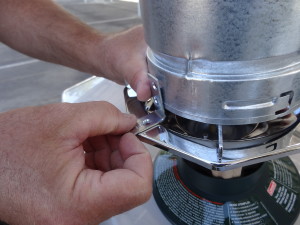
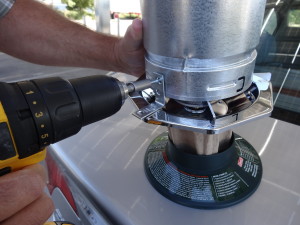
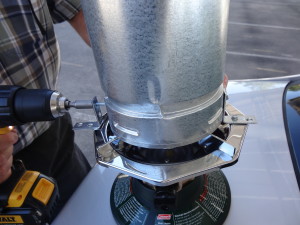
(1) – Screw the stove pipe to the stove using the corner braces – each corner brace has 4 holes for screws, but you only use 2 of them.

DSC02882


DSC02883


DSC02884


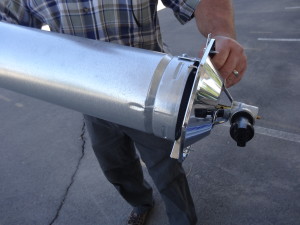
Repeat with a corner brace 180 degrees opposite the first brace.

DSC02885


DSC02886


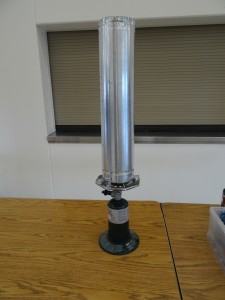
Attach the propane tank and you have a finished launcher. We use a butane lighter to light ours. We also have a squirt bottle of water to put out any fires – rare, but tissue burns pretty quickly. At the balloon races with 14 of these going, we also had fire extinguishers (never used one) available.

DSC01270


Here is a link to a Flickr set from launch day at the races. Also some pics of weather balloons we launched –  NOTE – we check these launchers out to local schools so they can launch at school – teachers often want to go further with the design process now that the students are excited.

Learning is messy!

Send Your Students’ (and anyone else’s) High Hopes Up High

Note: If after reading this post you decide to participate leave your “High Hopes” Here.

IMG_4969 Doug Taylor and I started the High Hopes Project back in 2010, when we were both teaching 4th grade. Doug had seen this article about MIT students sending a styrofoam cooler attached to a balloon with a camera inside to near space and thought it would be a great way to study the layers of the atmosphere and other topics we were supposed to teach. Besides the science, language arts and other curriculum the project uncovered, we hit on the idea of having the students write their “High Hopes” for their school, community and the world. We shared the idea on this blog HERE, on our class blog, and I spent much of my TEDx Talk in Denver that summer describing the project.

We are planning our biggest launch yet during the spring of 2015. To kick off this project, which will be explained in more detail in future posts, we are launching 3 high altitude balloons this Friday from the Great Reno Balloon Race while 900 students are there to launch their own tissue paper balloons (see previous post). The balloons will make it to about 60,000 feet ( 18,000 meters) and will carry the “High Hopes” of anyone that sends us their “Hopes” by this Thursday night (9/4/14). In addition we will send them up this spring during the larger project.

To participate either write a “class high hope” or have students submit their individual high hopes in the format: “I live in (Optional), and my “High Hopes: for my school, my community and the world are …”

Here are some actual examples written by our fourth graders in 2010:

I live in Sparks, Nevada, and My “High Hopes” for school include graduating high school and working hard to improve my grades. But my Highest Hope for school is to graduate college and get a good job that I like.

I live in Sparks, Nevada, and my “High Hopes” for my community include police because they keep us safe, hospitals because they can heal and fix the injuried and schools so we can graduate school.

I live in Sparks, Nevada and my High Hope for the world is ending homelessness because it’s kind of sad that someone has no roof over their head.

Learning is messy!


Nevada Tahoe Teacher STEM Institute

3 weeks ago we participated in the Nevada Tahoe Teacher STEM Institute. Over 50 K – 9 teachers from all over Nevada came to the Tahoe Environmental Research Center (TERC) at Sierra Nevada College in Incline Village, Lake Tahoe, for a week of STEM learning. The funding was based on a Math/ Science Partnership Grant we wrote and received through the Nevada Department of Education. The event was put on by the Nevada’s Northwest Regional Professional Development Program, Washoe County School District, TERC, along with help and support from others mentioned in this post. BELOW: We started off with a group photo.

DSC02659


Sunday evening we started them off learning the science of tie-dye (covalent bonds and all) and made the case for STEM learning. We also set up a STEM notebook for each teacher as well as a digital notebook (blog).

DSCN0574


The next day started at 6:30 am for breakfast and a day of Project WET, GEMS (Great Explorations in Math and Science), background in the Next Generation Science Standards (NGSS), a trip on the TERC research vessel on Lake Tahoe, stream studies and training on and set-up of blogs, wikis and a Flickr photo account – all of which we added to all week.

DSCN0584 DSC02667


GEMS – Great Explorations in Math and Science


Out on the TERC research vessel


ABOVE: Field Lab Director Brant Allen explains the use of a Secchi disk in reporting out the clarity of the water in Lake Tahoe. The clarity has degraded from over 100 feet to about 70 feet since the 1960’s. BELOW: Secchi disk being lowered into the lake.


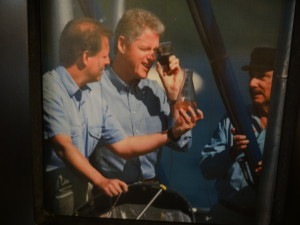
A couple of past visitors to the TERC research vessel you might recognize: DSC02702


BELOW: Stream monitoring and benthics.

IMG_5518


During following days all teachers learned geology, aquatic habitats, space science, ocean science, food webs, the ethics of teaching outdoors – and the middle and high school teachers also worked in the Soluble Reactive Phosphorous Lab solving a mystery about pollution sources ala CSI. The grant provided experts from GEMS, TERC the USGS and others to teach classes and lead labs.DSC02753 DSC02758


In the Soluble Reactive Phosphorous Lab

DSC02786


BELOW:Food webs


Ladybugs!

DSC02792


Participants loved the “Digital Sandbox”

DSC02766 Geoff Schladow – Director of the Tahoe Environmental Research Center explains the “State of the Lake.”


We also got to visit the lake at sunset:

DSCN0838


Besides the more than 40 hours of training, participating teachers each received lessons, supplies and other resources to take back to their classrooms and students so they can use what they learned right away. In addition teachers will have monthly follow-up sessions to share their progress, ask questions, share resources they have developed and make connections through the classroom blogs, wikis and Flickr accounts they set-up. It was an intense and rewarding week of learning and sharing in one of the most beautiful locations on Earth!

FLICKR Set from the institute

NTTSI Wiki

Learning is messy!

Why should education leaders embrace digital technologies in their schools?

Why should education leaders embrace digital technologies in their schools? leadershipday2014_01-300x240

1) If you are in a state that adopted the “Common Core State Standards” (CCSS) you really don’t have a choice. There are many (yes many) English Language Arts standards alone that require students as young as kindergarten to use technology to read, produce and publish digital content and to collaborate in doing so. Just a few examples from the CCSS:

K – 12 – Use technology, including the Internet, to produce and publish writing and to interact and collaborate with others.

K-12 – With guidance and support from adults, explore a variety of digital tools to produce and publish writing, including in collaboration with peers.

6th grade – (NOTE: by 6th grade the “… guidance and support from adults …” is gone. 6th graders are to master this standard on their own) Use technology, including the Internet, to produce and publish writing as well as to interact and collaborate with others; demonstrate sufficient command of keyboarding skills to type a minimum of three pages in a single sitting.

5th grade –  Analyze how visual and multimedia elements contribute to the meaning, tone, or beauty of a text (e.g., graphic novel, multimedia presentation of fiction, folktale, myth, poem).

I’m not sure how we get our students to the mastery of these standards, and many others without ubiquitous access to and utilization of the technologies required.

2) Collaboration – This was already stated in the standards above, but those were specifically language arts standards. Communication and collaboration are already key to being educated, but also in getting a job. Learning to collaborate with the student next to you in class or in your group is great, but technology makes it easy (yes, easy) to collaborate globally. Will it be “good enough” if students just learn to collaborate in class? Will that foster solid collaboration skills with today’s (and tomorrow’s) technologies? Not that getting a job is the only reason to learn solid collaboration skills, but getting a job without having those skills is not getting easier. Mastering all the ways collaboration is leveraged personally and using technology is vital.

3) Programming and design – 3D printing (did you know they are printing whole houses, food and blood vessels already?), also –  software development, engineering, graphics, architecture, transportation, art, medicine,  and much more all rely on programming and design skills … this is what is happening now in fields with good paying jobs.

4) Inventing (often referred to as “making” these days) – This is hands on and motivating and requires the skills developed through pedagogy that includes all of the above.

5) Problem solving – (See above)

So you think children are already mastering these skills and technologies on their own by using their smart phones and other technology 24/7? Ok, let’s see how that works out with your students.

I don’t pretend that I’ve included all the reasons that leaders should consider (please add your own in the comments). But these are not easy or cheap changes that have to happen. We’re not going to provide the technology and professional development and commitment to change on the cheap. Only real leadership will get us there.

Learning is messy!
Lake Tahoe Launch … Messy and Worth It – The Short Version

So after last week’s debacle … we learned to be patient and wait for better wind conditions. Here’s the short version of what happened. We inflated on the beach at DL Bliss State Park:


Paddle boarded the balloon out where the clear water of Lake Tahoe was about 45 feet deep:


With a snorkeler for help (he also shot some great video with a GoPro I’ll share another time):


Next we launched with 2 GoPro cameras 40 feet deep in the lake at the end of a line and 4 more on other payloads:


Here are some of the views we got:

For size reference: Lake Tahoe is almost 22 miles long and a bit more than 11 miles wide. (35 km long X 19 km wide). The lake is 1645 feet deep (501 meters).

Lake Tahoe, Carson City, Nevada, Reno and Pyramid Lake from 90,000 feet + (near space)


Then the balloon burst somewhere between 95,000 and 100,000 feet – follow the link to see the frame by frame of the burst:

https://www.flickr.com/photos/101610181@N02/sets/72157644958349838/

And the video:


Then it landed and we went and got it:

There was some animal byproduct to deal with:

It was a great day!

Here is a link to more photos.

NOTE: This launch was part of a project being developed by the University of Nevada, Reno- Mechanical Engineering Department, the 21st Century Division of the Washoe County School District, and Nevada’s Northwest Regional Professional Development Program (who I work for now). We were trying out some technologies and possible engineering and science problems to turn over to area K-12 students to solve for a similar launch next April or May – still in the planning stages.

Learning is messy!
Ball Chain Inquiry – STEM

Yeah, I know. Ball chain inquiry?

Ball chain is that chain that keychains and the like have been made out of for years. I’ll bet some of you have seen this before – there are several videos online and “Mythbusters” included it in an episode.

IMG_2035


When I saw those videos I had ideas right away for an inquiry piece that would be fairly cheap and easy to do. I haven’t thought enough about it yet to match it to specific standards … but I’m always on the lookout for easy / quick ways to demo inquiry during professional development trainings I do and I saw potential for this right away.

This 250 foot roll came in a few weeks ago but I haven’t had a chance to try out my ideas yet – today not many folks are in the office, so I jumped at the chance to finally mess around with it and see how it works.

Before saying more let’s take a look – click the video below:


One thought I’ve already had besides, “So what exactly causes that to happen?” (is it somewhat on the same principle as a siphon? –  Not sure – just wondering) is to measure out lengths of the ball chain (10 meters say) and time how long it takes to empty the container. Then ask, “How long do you think it would take for say… 20 meters?” (exactly twice as long? … or does it speed up as it falls?) NOTE – I wouldn’t share that with students, let them decide and then in writing explain their thinking. So they need to time it precisely (do more than one trial at each length – probably 3).

Next keep adding lengths to the chain with the connectors and see if students can become accurate at predicting the exact time. AND – then start including various lengths of chain, like 17.4 meters … can they predict that? What math do they require to figure that out? Or involve fractions instead of decimals – “How long would it take 47 3/4 meters to empty?”

Does height play a role? Does it drop at a different rate from different heights? How would we figure that out?

I see lots of possibilities for this. When I get a chance to try this out with teachers and/or students I’ll let you know what I find out … OR – if you get there before me, let us all know in the comments. Any other ideas how this could be utilized as a learning activity?

BTW – I got that 250 foot roll you see in the photo online for $20 and a bag (50 at least) of the connectors for a couple dollars more. (#10 ball chain – it comes in various sizes – that would be another exploration – does different size chain fall at different speeds?)

Learning is messy!
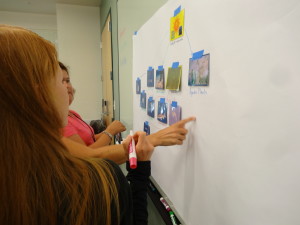
Even Saturday Afternoon We Are 3D Printer Building

Yes, we we’re back at it today. Not everyone could make it, but there we’re 14 –  3D printers under construction today. A few folks even finished and got theirs printing. Some of us have missed possible work days so we are a bit behind, and next week I’m off to New Orleans for the NSTA STEM Forum and then my daughter’s graduation from the University of Nevada, Las Vegas, so I’ll miss the next 2 work days.

IMG_1942


Today featured lots of soldering:

IMG_1940


And attaching pieces with allen wrenches and lock nuts:

IMG_1943


Ironically, some of the parts we installed today we’re printed on a 3D printer – I placed the pliers in the shot for scale:

IMG_1947


Which when assembled and attached to a motor became a new part:

IMG_1949


Our progress today:

IMG_1948


IMG_1950


IMG_1951


Lots of messy learning today … had to drill out a piece made from aluminum that was not quite big enough to accept a heater core … I can’t show pictures of how we did it … not a good example for safety, holding a piece in my hand while using a high speed hand drill to bore it out – took a half hour at least. A few parts that had to be uninstalled and then reinstalled to get everything to fit just right slowed things down as well.

More in a week or so.

Learning is messy!
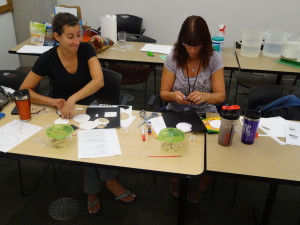
I’m Building a 3D Printer – Day 2

A few days ago I posted about being part of a class for teachers and educators where we build a 3D printer and learn to use it and the keep it to use with our students and teachers.

Today we were given the entire 3-4 hours to just get back to work assembling our printers. The group all retrieved their boxed printers and got to it.

IMG_1862


BELOW: What I got done the 1st week:

IMG_1859


BELOW: Most of what still needs to be assembled.

IMG_1861


This printer is mostly made from wood. Wood that has been laser cut into parts … VERY precisely. The burning involved in laser cutting is betrayed by the black edges of the parts as you break them apart during assembly, as well as a hint of burning wood in the room and our somewhat blackened fingertips. Lots of screws and nuts, washers, gears and more are involved.

IMG_1864


We got to a certain point today and the next step meant we had to get the 5 electric motors required:

IMG_1865


As we assembled the frame, which involved installing the first motor, the shape of the printer emerged.

IMG_1867


When we ran out of time today we had a few more parts assembled and ready to add.

IMG_1869


By that point we had also installed the second motor.

IMG_1870


As pieces are snapped out of the laser cut wood lots of these little pieces fall out … are they all unnecessary? Or ??? Deciding keeps you on your toes.


That’s as far as we got today and it might be 2 weeks before I get a chance to work on it some more. We’re told it could be 20 hours of work when tweaking all the settings and getting software setup and all … after today we were about 7 hours in.

BELOW: The printer they assembled to check out the assembly process was busy today printing out gears for a transmission (note the image on the computer):

IMG_1873


Here’s a short video of the printer in action – click the link.

Link to 3D printer video

Learning is messy!
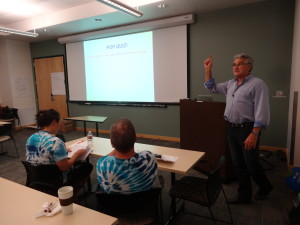
On The Road – Project Wet Training

logo

One of the valuable STEM learning opportunities I’m part of right now is training teachers across our state in Project Wet. Think of it as Project Wet with a STEM focus.

We wrote and received a rather large grant sponsored by the Nevada Division of Environmental Protection (NDEP). Its enough money that we will be conducting these trainings for about 2 years with the goal of training hundreds of educators statewide in water and other science content.

Myself (I’m the STEM Learning Facilitator for northwest Nevada), Lou Loftin who is the Science Learning Facilitator, and Mary Kay Wagner an Environmental Scientist in the Bureau of Water Quality Planning with NDEP, are a team that travels around providing 16 hour trainings statewide. Nevada is a huge state (from here in Reno to Las Vegas is over 400 miles one way) so we put many miles on Lou’s truck which we cram full of equipment and supplies when we go on the road.

DSCN0029


Currently we are in the middle of a 4 session class that convenes just south of here at River Fork Ranch in Genoa, Nevada.

IMG_1826


IMG_1827


We combine lessons right out of the Project Wet Guide 2.0 (which you cannot buy – you must participate in a least 6 hours of training in Project Wet to receive a guide) with hikes through the parks where our classes usually take place, some training in online photo archiving (Flickr), wikis and the online Project Wet Educator’s Portal.

IMG_1830


DSCN0144


Besides receiving a copy of the Project Wet guide, participants in our trainings also take supplies and resources provided by the grant back to their classrooms – beakers, pipettes, graduated cylinders, measuring tapes, Earth globes, maps and more. They also take back the links and online resources we help them register for (see above) and the network of teachers they meet and link to as part of the class. Several participating teachers have already brought their own students to the sites on field trips.

If you follow me on Twitter I often Tweet out photos and reports of where we are and what we’re up to. We have several more “Wet” classes coming up before June in eastern Nevada, and come fall we’ll continue our treks around the state. One of the “perks” of a project like this is getting to visit the beautiful places that abound in Nevada.

BELOW: Photos from our training in Las Vegas at the Clark County Wetlands where they pump 3 million gallons of water from the water treatment facility through the park daily to help provide habitat for a surprising amount of flora and fauna in the desert.

DSCN0041


DSCN0060

IMG_1749


DSCN0081


DSCN0055


DSCN0052


Learning is messy!
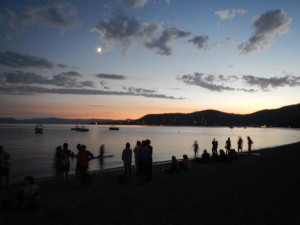
STEM: Cantilever Spans

IMG_1061


Background on Cantilever Spans

(click on any photos in post to see enlarged)

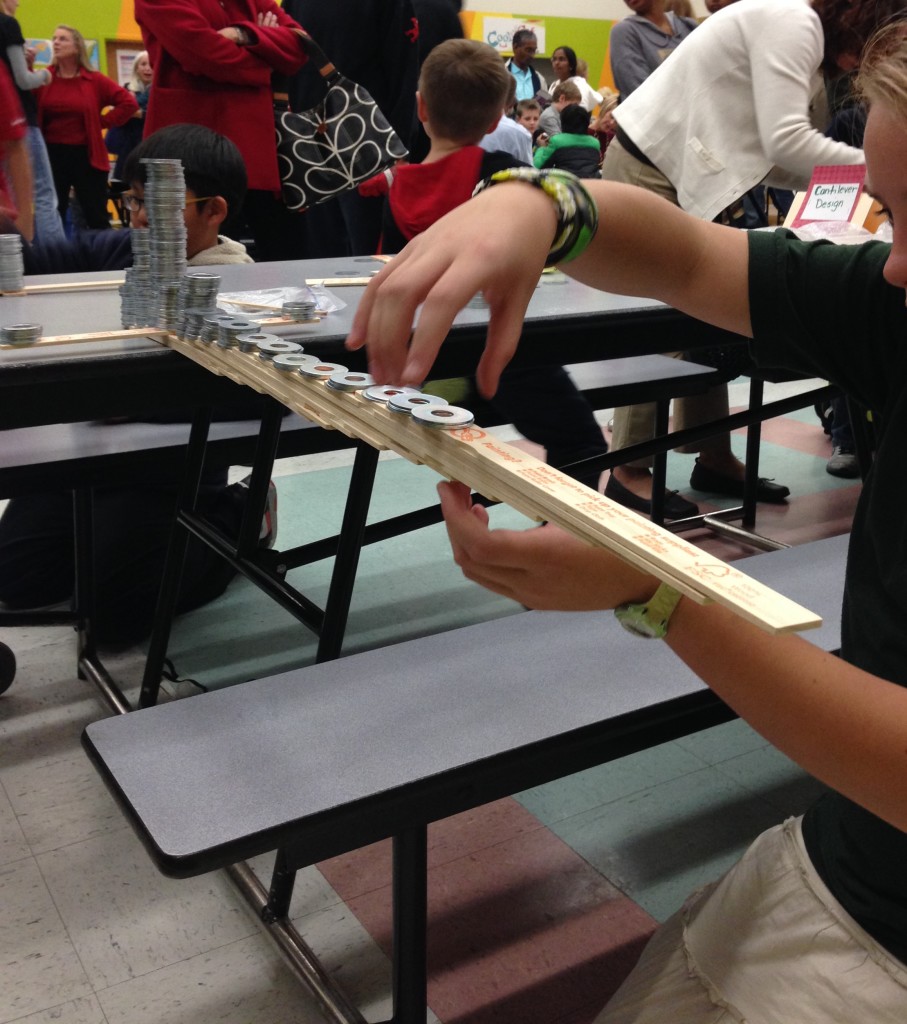
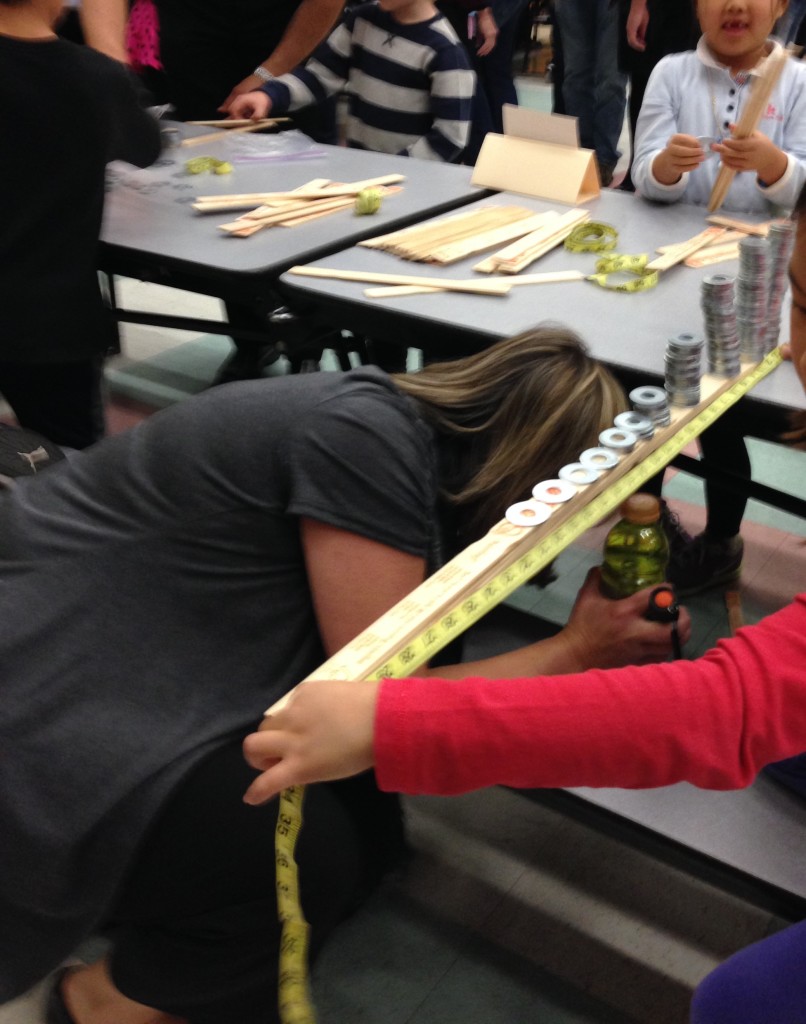
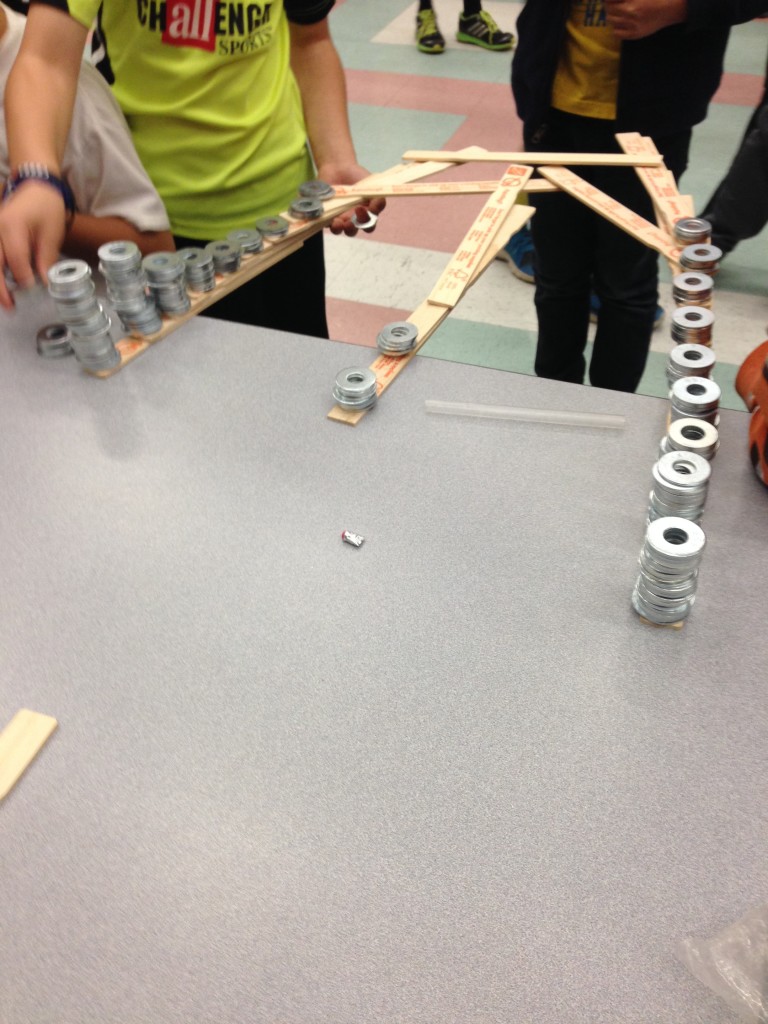
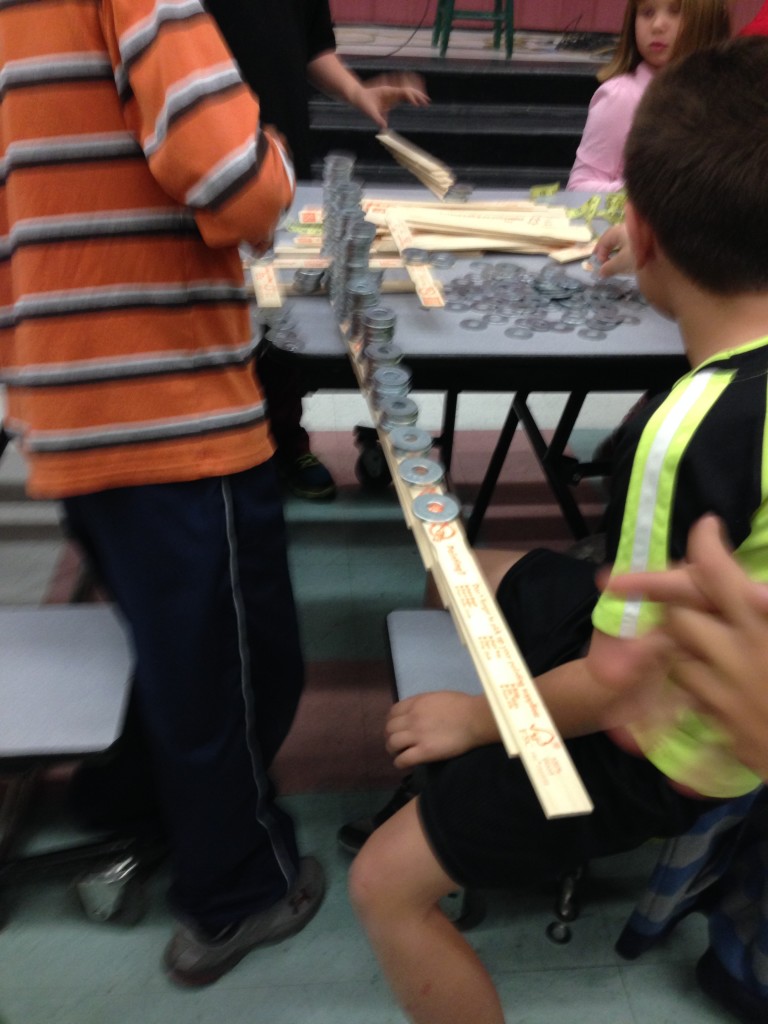
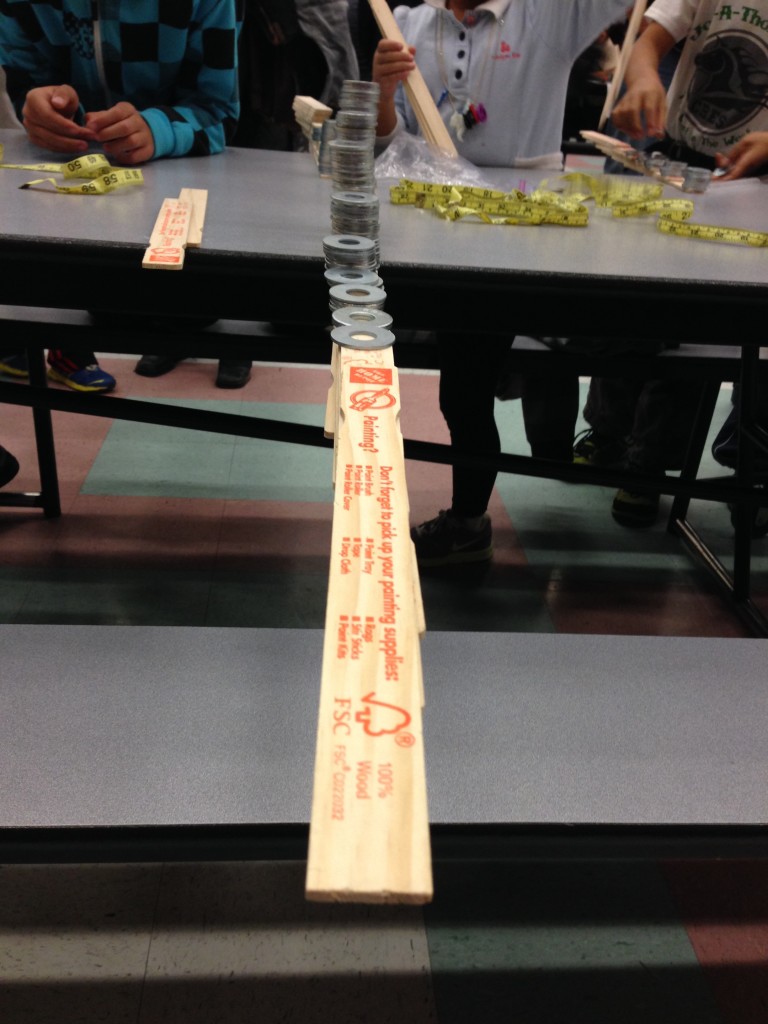
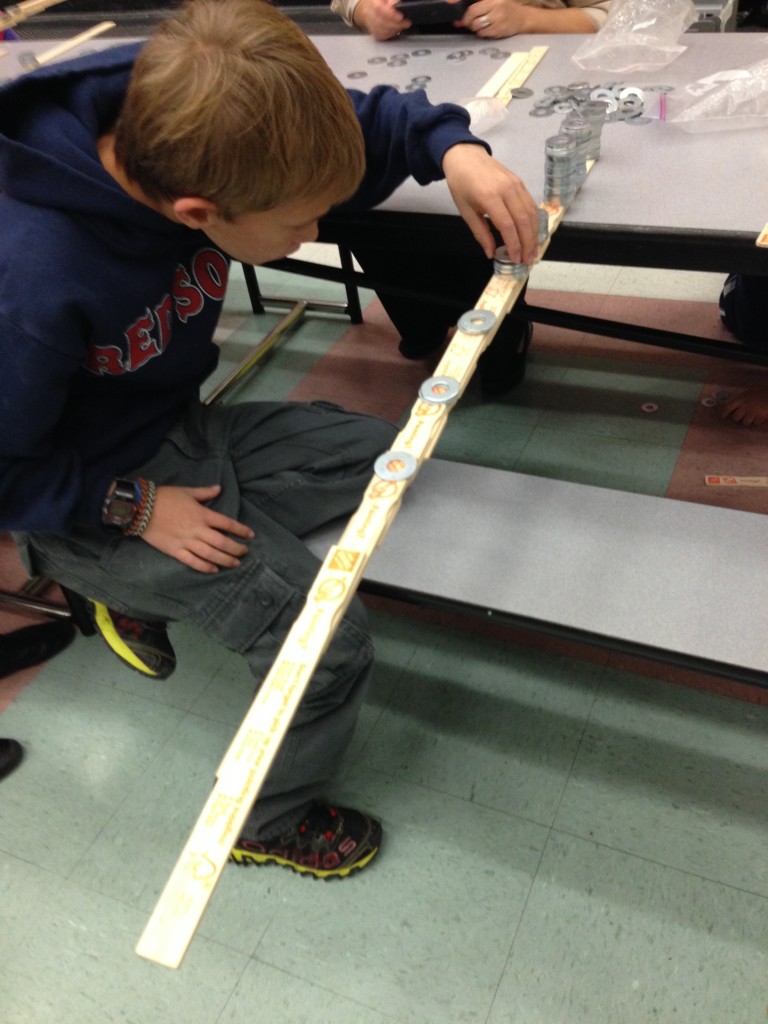
We participated in a school’s Family STEM/Science Night recently, which always ends up being a kick. Having families participate together and watching what happens is a blast. My cohort in science, Lou Loftin, who is the Science Learning Facilitator (I’m the STEM Learning Facilitator) where we work, took an idea he stole borrowed from a colleague last year, shared it with me, and we ran with it. Lou was running a, “How Many Drops Of Water Fit On A Penny” station, and I ran the, “Cantilever Span” station – it worked out even better than we imagined when we planned it. This would be an incredible classroom lesson that could stretch over several days to several weeks depending on just how deep you wanted to go.

So, how does it work you ask?

Materials:

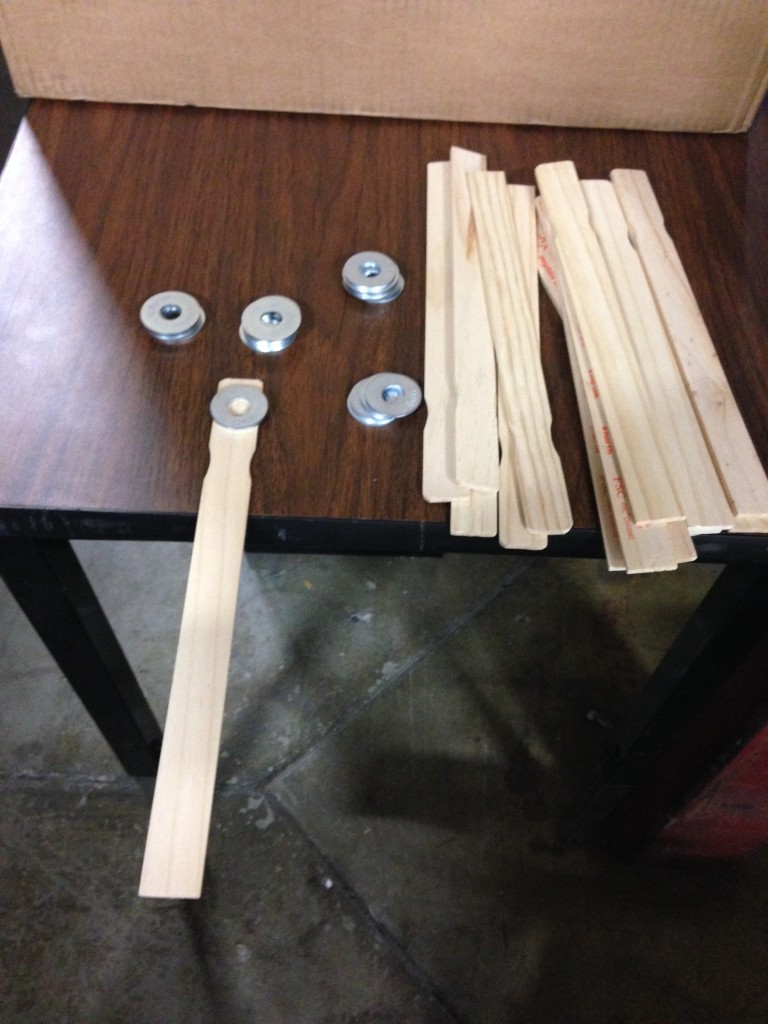
Paint stirring sticks – in this case probably 200+ – we procured these from a big box hardware store … for free when we explained we were using them for science and gave them the obligatory sad, begging face.

Washers – (other weights could be substituted) – these are about “half-dollar size” – we had several hundred.

Thats’s it!

__________________________________________________________

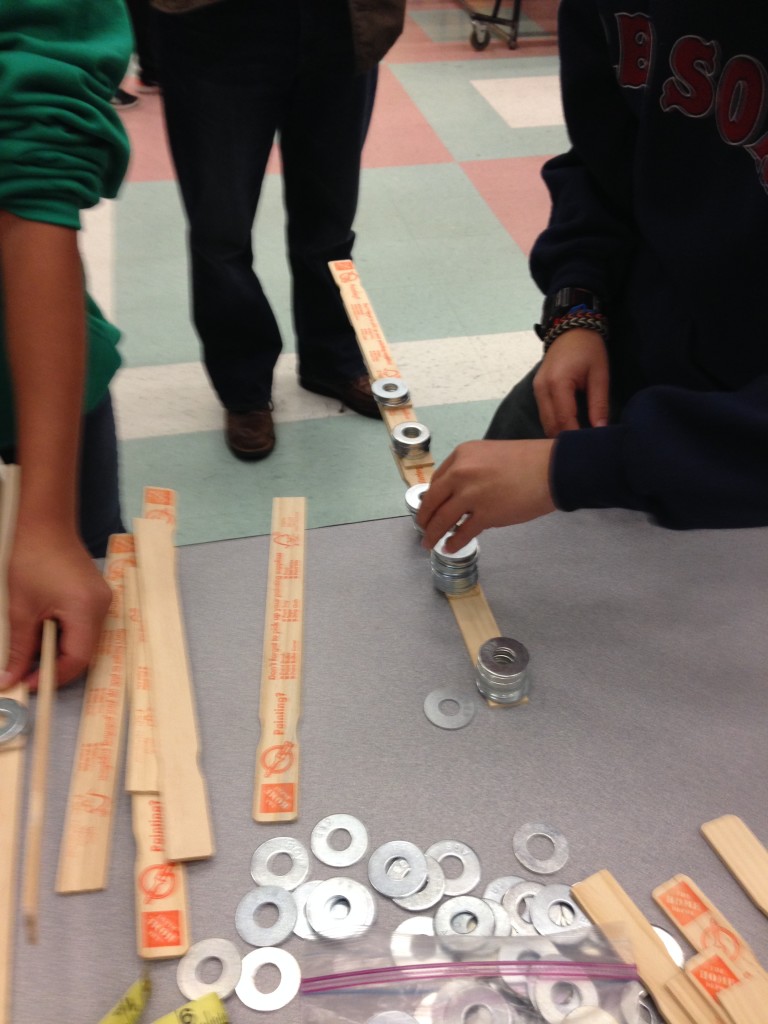
Since this is an inquiry experience, I gave as little input as possible. When getting a participant started (and usually parents stepped back and let their children take it on themselves) I would take one stirrer and place 2 or 3 washers on the end, stick it out from the table (see photo below) and then explain that they were to make as long a span as possible out from the edge of the table. “You can use as many washers and stirrers as you want …. Go!”

IMG_1072


No other directions – and questions like, “But what do I do?” were answered by me with shoulder shrugs.

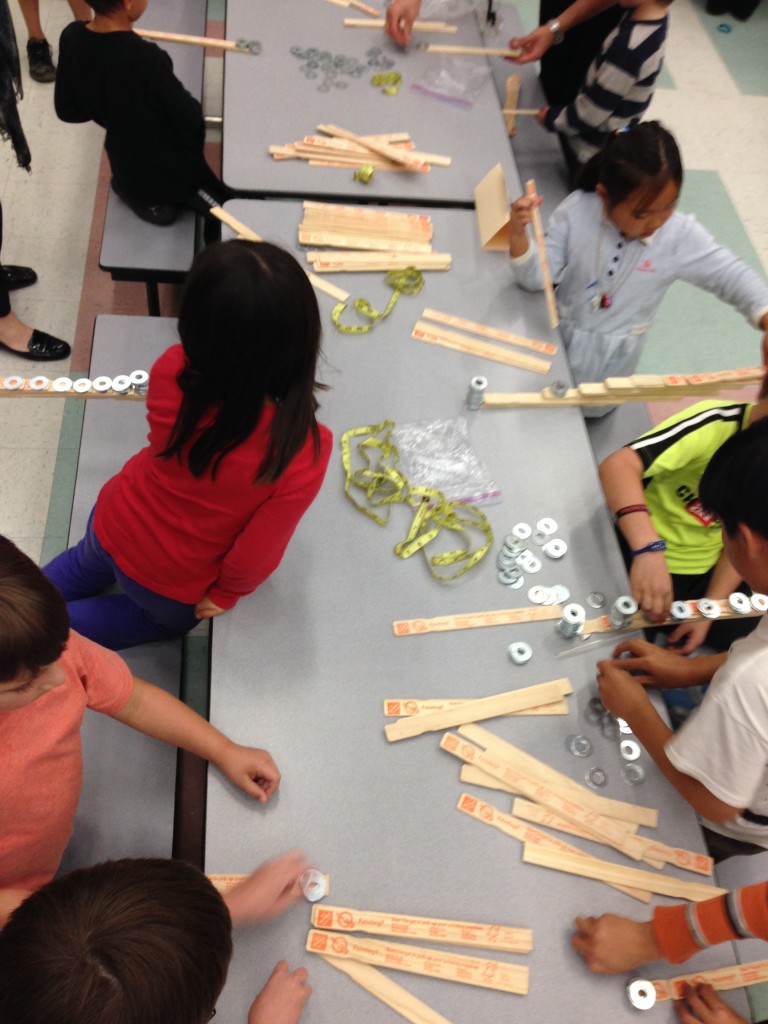
Some students worked by themselves and others grabbed friends and siblings (sometimes parents) and worked in groups. Preschoolers through middle schoolers stopped by, often confused about what the heck was happening here, but we could have charged a fee …  if I’d really wanted to be evil (and rich) I would have mentioned that the first ten minutes are free but after that it’s $0.25 per 5 minutes. This event was only an hour long and there was plenty else to see and do … and parents were having to beg their children to leave … “Honey we only have 20 minutes left and this was only the third station we stopped at.” – “Ah Mom.”

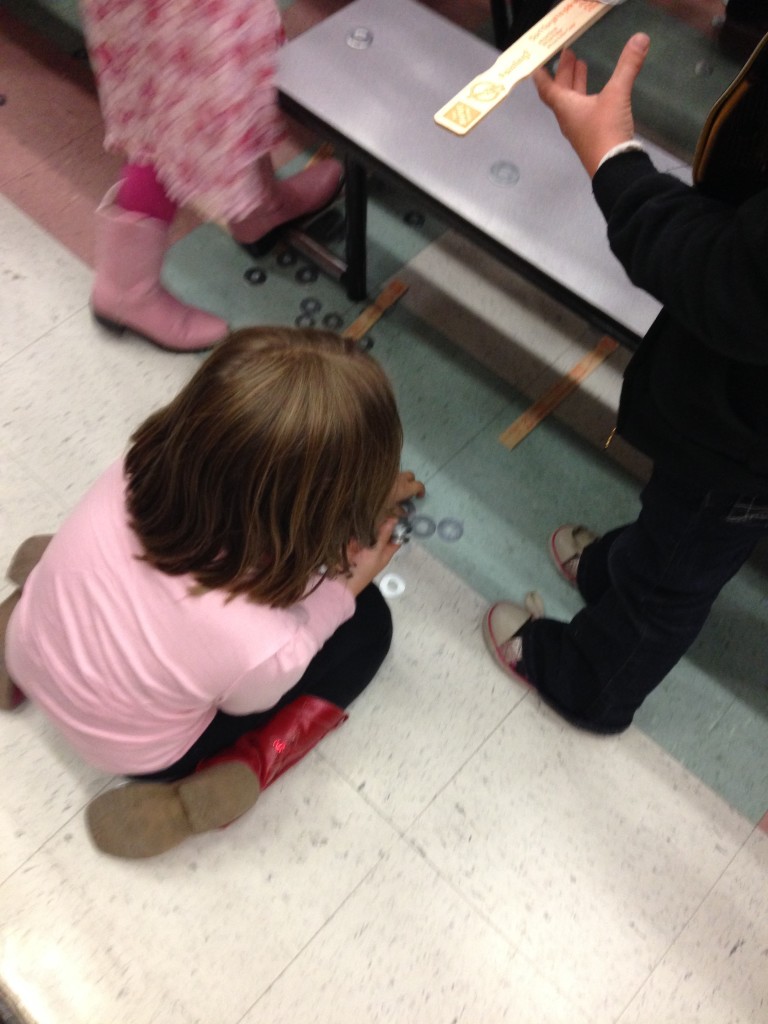
As things proceeded there are failures … which are punctuated by the sound of 20 – 100+ washers crashing to the tiled floor, followed by the realization that the scattered washers and stirrers would have to be picked up. That deterred a few, but generally as fast as they could recover their materials they were back at it.

IMG_1069


IMG_1053


And when I say they were back at it … check out this video clip of one more intense participant:

We put out measuring tapes – a few measured (and if this had been a classroom learning experience we would have done that for sure), many took photos of their span.

IMG_1054


In the classroom I would do just about this same experience as a first step, but:

– Next have students design as long a span as possible with as few washers / stirrers as possible.

– Give materials a cost and have students build the longest most cost effective structure.

– Perhaps have them build a structure that is not necessarily the longest, but with the most stirrers as possible sticking out beyond the edge of the table?

– Can structures be started out on facing tables and meet in the middle to form a bridge between tables? Lots of possibilities.

Two groups that built next to each other decided to connect their structures:

IMG_1059


WARNING – OK warning is a bit strong. But keep in mind that these structures are easy to bump into with disastrous results. So think about that when planning where to have students build. Move all the desks to the 4 walls of your room and build out from there? Perhaps the cafeteria? Library? other large room where separation between structures is possible? Also have that discussion with students about looking out for each other.

In the classroom I would also spend some time talking about reacting to disappointment when for any reason their span collapses. Really disappointing for sure, but in the real world this happens (maybe show the Tacoma Narrows Bridge collapse video after your first experience – adults have things end in disaster unexpectedly too) – just know that and carry on.

Writing pieces on what, how and why in a journal would be great. As would thoughts on what will/would we do differently? I haven’t had a chance to develop creative writing ideas yet, but descriptive words about what it looks like, feels like, … colors, etc. can always be turned into poetry and stories.

More photos from the experience:

IMG_1066


IMG_1050


IMG_1044


IMG_1039


Here’s a link to a Flickr set of photos.

UPDATE: If you played the video above note how tenuous the balance is. Note that the weight on the table has to be more than the weight hanging off the table. How much weight on the table is necessary to offset the weight off the table? Going deep might include pre- weighing the stirrers and washers and then getting as close to equal weight on both sides of the edge of the table. Think of the edge of the table as the equal sign in an equation, but this is going to be an inequality because there has to be more weight on than off the table. How close can you get to equal? Is there an inequality that shows that correlation?

Learning is messy!