Tissue Paper Balloon Construction and Flight “How-To”

Materials and step-by-step with video and photos.

I’ve had lots of requests from people that remember this post from last year lately – so I’m reposting it to make it easier to find. This is a fantastic STEM activity. Plenty of “messiness” involved:

Tissue paper hot air balloons are one of those powerful STEM learning experiences that lend themselves so well to being cross-curricular.
There are the construction aspects that include measurement (length & angles for example) and skills like cutting with scissors precisely, gluing and following directions. Making mistakes, learning from those mistakes and moving on (messy learning). Collaboration, since in the classroom students usually construct the balloons in pairs or small groups. The engineering design process since as students launch their balloons they can note design changes that would lead to an improved design, make changes and relaunch to check results, and so much more. Oh, and yes, one of my favorites, there are artistic design aspects as well.  LEFT: Tissue paper balloon launch from 2013. Note the excitement of the kindergarteners as they chase it down! At this age teachers sometimes choose to construct a “class balloon” or two or three (but certainly more at times). Classes sometimes “buddy” as well – a 5th grade and a 1st grade for example.


Link to PDF of construction steps – also includes different sizes of tissue paper – we used 20 x 26 inch (51cm x 66cm) paper in videos below because it is what you usually find.

MATERIALS – So, what’s required for construction?

For EACH balloon:

– 18 sheets of 20 x 26 inch (51cm x 66cm) tissue paper (or note other size possibilities in PDF linked above) (100 sheet packs are around $12)

– scissors,  meter stick, protractor, marker, glue stick (during construction you will use the entire stick),

Here’s the video of what you would expect to get done during the first class period – about 45 to 60 minute period.

Part 1 – below

Day 2 directions below – again, expect a typical class period more or less:

Day 3 directions below:

Day 4 directions below:


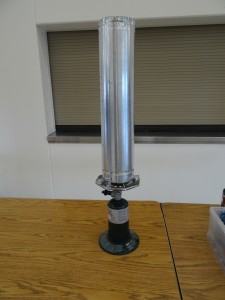
OK, so you have a finished balloon (or balloons perhaps) – how do you launch them? Here are the directions to make the launcher you see used in the video.

Materials:

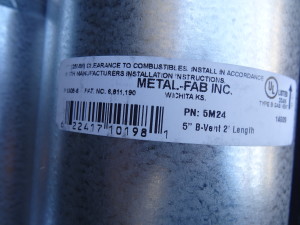
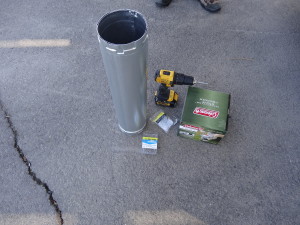
– (1) – 5 inch x 2 foot double wall stovepipe – from hardware store – about $12

DSC02874


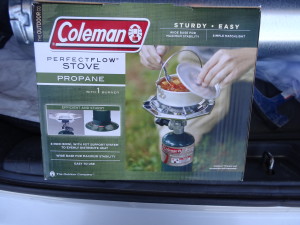
– (1) – Coleman (or other brand) propane 1 burner stove – about $35

DSC02875


– (1) – Propane tank (see in photo above of stove)

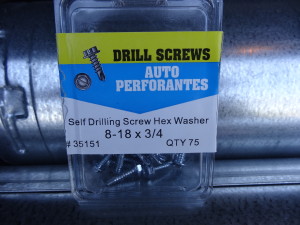
– (4) – 8-18 x 3/4 self drilling screws (box shown has 75 screws, but you only need 4)

DSC02876


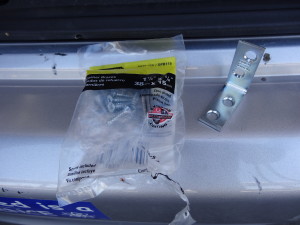
– (2) – 1 1/2 inch x 5/8 inch corner braces (pack in photo includes screws – BUT THEY ARE NOT THE ONES YOU USE)

DSC02877


– (1) – drill with screwdriver bit for driving screws. (see it in photo with other materials)

DSC02879


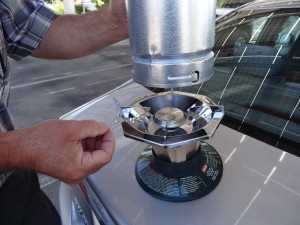
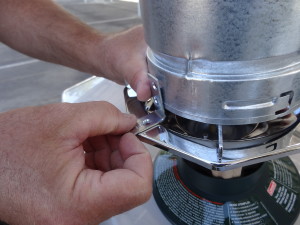
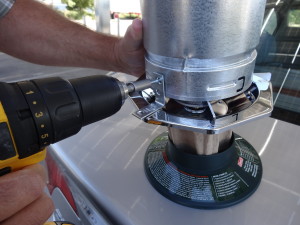
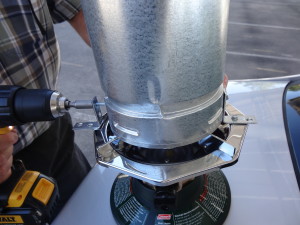
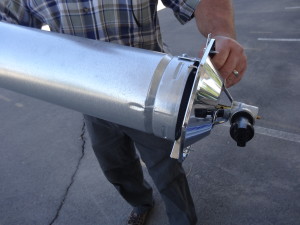
(1) – Screw the stove pipe to the stove using the corner braces – each corner brace has 4 holes for screws, but you only use 2 of them.

DSC02882


DSC02883


DSC02884


Repeat with a corner brace 180 degrees opposite the first brace.

DSC02885


DSC02886


Attach the propane tank and you have a finished launcher. We use a butane lighter to light ours. We also have a squirt bottle of water to put out any fires – rare, but tissue burns pretty quickly. At the balloon races with 14 of these going, we also had fire extinguishers (never used one) available.

DSC01270


Here is a link to a Flickr set from launch day at the races. Also some pics of weather balloons we launched –  NOTE – we check these launchers out to local schools so they can launch at school – teachers often want to go further with the design process now that the students are excited.

Learning is messy!

DeLaMare Science and Engineering Library

Maker and Collaboration Space

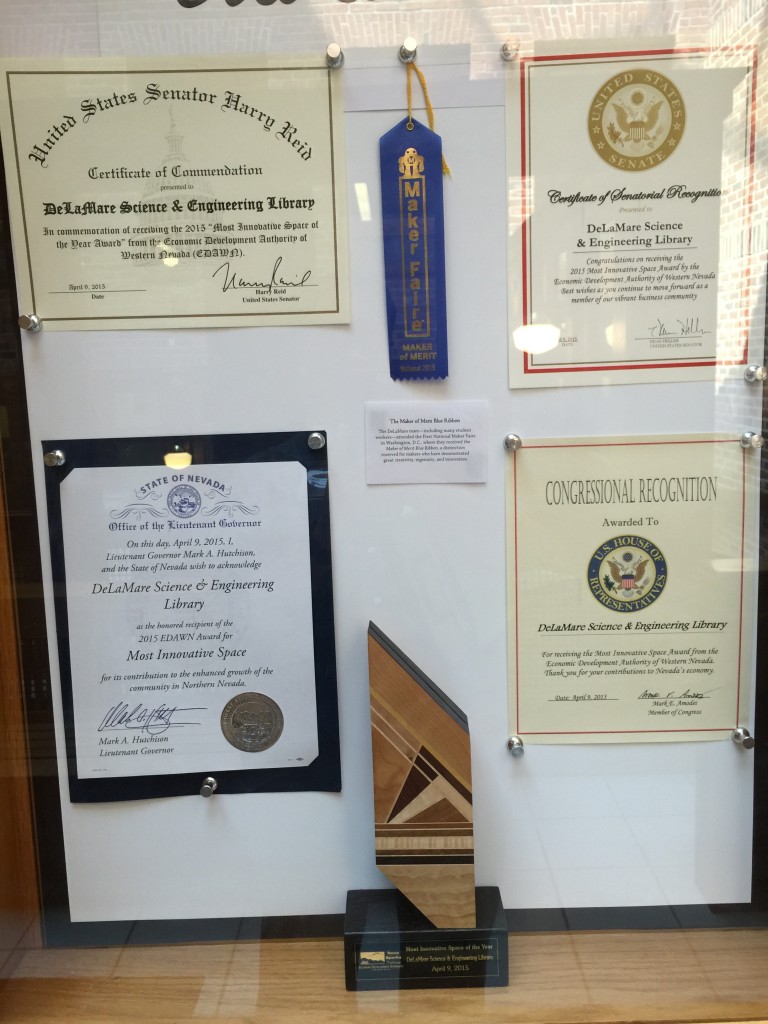
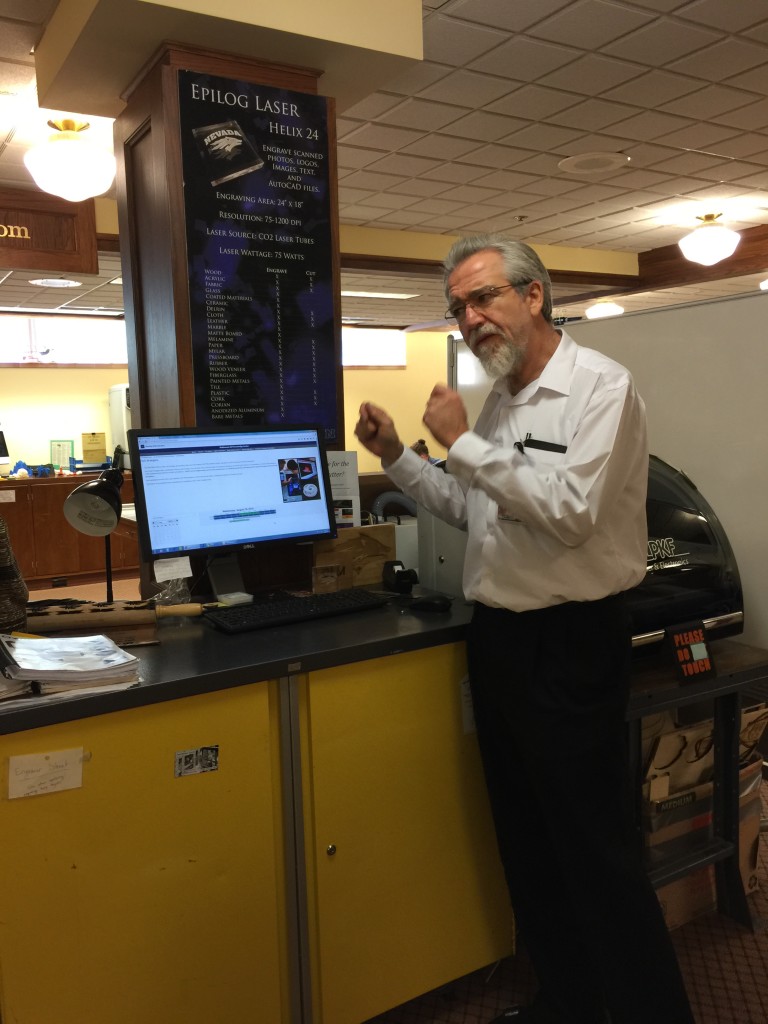
Last week I was part of a small group that was given a tour of the award winning DeLaMare Science & Engineering Library on the campus of the University of Nevada, Reno.

IMG_4008


Todd Colegrove,  head of the DeLaMare Library, took the time to show us around.

IMG_4012

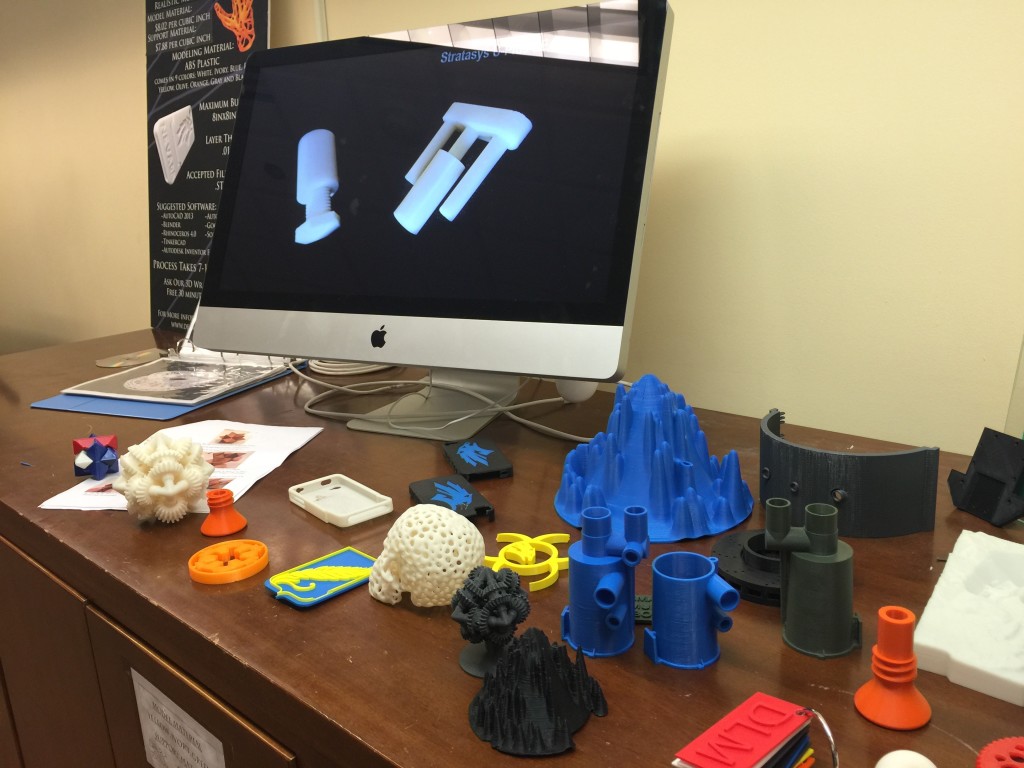
We saw laser cutters, 3-D printers, large format printers, Lego Robotics, Arduinos and many more resources which they will not only allow teachers and students to use, they have people ready to help you learn about and use them. Since they are a no-profit they will also print your 3-D designs for cost.

They also have collaboration rooms, many that have walls made of whiteboard material, tables, chairs, computers and more, that can be checked out and used. They also support classroom field trips to the facility that be everything from a tour of the facility and resources available, to using the facility to plan and “make” using the library’s resources.

IMG_4013


Here’s a YouTube video that shows the resources and maker spaces they have available:

IMG_4010


IMG_4009


IMG_4014


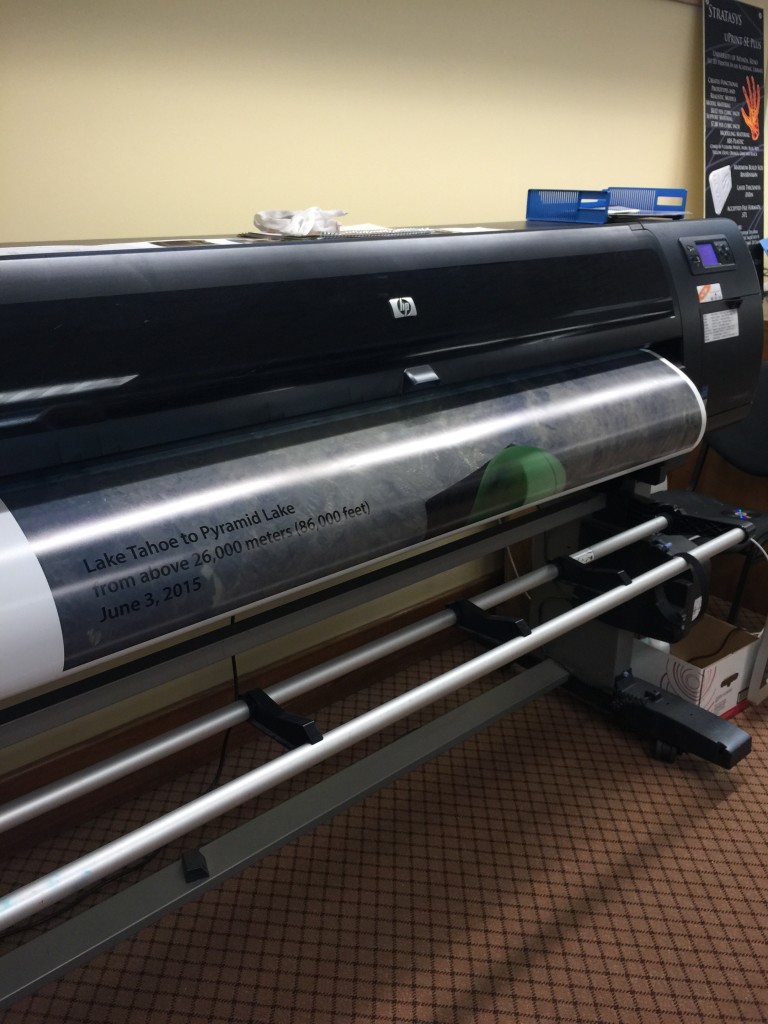
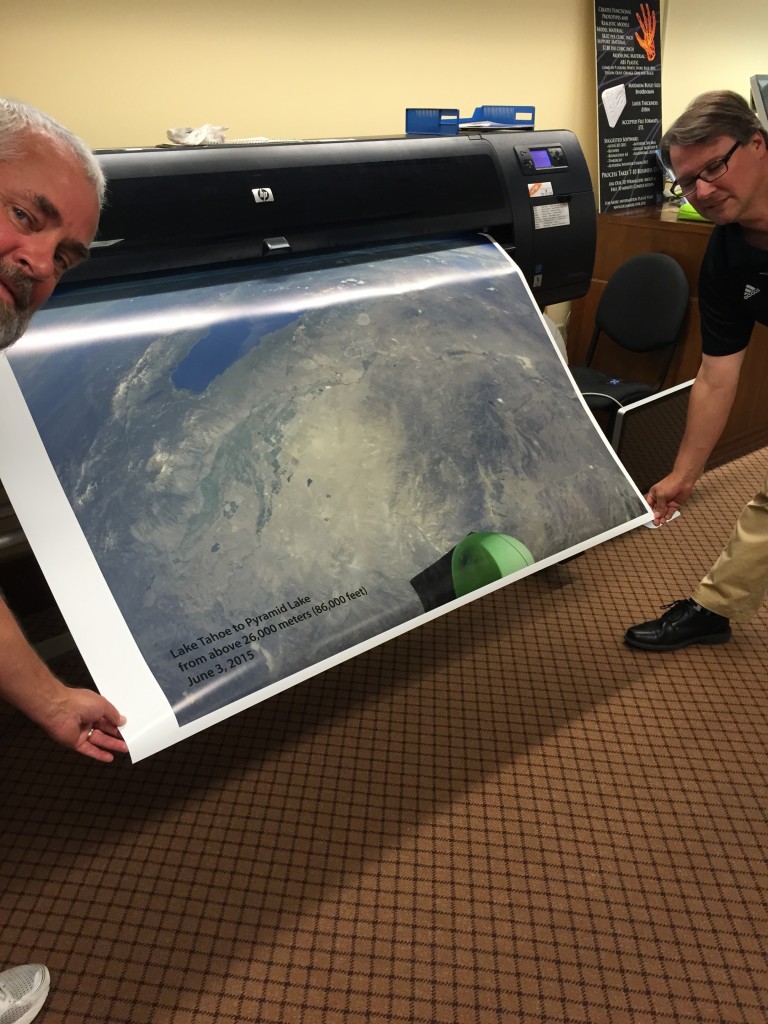
We took advantage of the opportunity to print out in large poster size one of our favorite photos from the “High Hopes Project.”


IMG_4015

We printed on a nice matt paper in 42 x 54 inch size and it cost less than $30.


I’m planning on making a trip to learn about and use the DeLaMare Library as part of classes and trainings we offer to encourage teachers and the community to take advantage of this incredible resource.

Learning is messy!

Edutopia Post About the High Hopes Project!

A few weeks ago I was asked to submit a post for Edutopia (Supported by the George Lucas Educational Foundation) about our “High Hopes Project.” It was a challenge based on my schedule right now, but on the other hand it forced me to be more thoughtful in explaining what is a multi-layered project. I was restricted, thank goodness, to 800 words or I might still be writing. You can check out the post here. It does the best job so far (according to my biased opinion) of explaining the project.


Learning is messy!!!

Online Presentation: STEM – What Does That Really Look Like In The Classroom

On Saturday, April 25, 2015, I’ll be delivering an online version of one of my most requested presentations: “STEM – What Does That Really Look Like In The Classroom.” I’ll share real STEM projects right from my classroom. The projects will showcase  integrated examples that demonstrate how hands-on STEM provides engaging and motivating opportunities for collaboration and problem solving that when coupled with students communicating and presenting their process and results leads to powerful language arts and math learning. This work isn’t shoehorned into your day, it becomes your day, at least for periods of time.

NSTA Virtual Conference STEM Today For a Better Tomorrow

My presentation is just one of many. The National Science Teachers Association (NSTA) is producing an entire day virtual conference on STEM they are calling, “STEM Today For A Better Tomorrow.” 

From their web page:

“The future is bright for careers in STEM. However, too many students do not have a strong foundation in science, technology, engineering, and mathematics to pursue careers in these fields. In the STEM Today For a Better Tomorrow virtual conference we make the case for the role that STEM education plays for students interested in following a STEM career.”

The conference begins at 10 am Eastern Time and offers a wide range of speakers and presentations. The agenda for the day with descriptions of the sessions is posted on the site as well. One I am looking forward to is offered by Captain Barrington Irving. I recently  co-taught a model hands-on STEM inquiry lesson to teachers demonstrating the power of integrating language arts, math and art. As part of that lesson teachers in the class read an article about the exploits of Captain Irving:

Barrington Irving“In 2007, Captain Barrington Irving became the youngest person to fly solo around the globe. On his 97-day journey, he flew 30,000 miles in a single-engine plane called Inspiration. “

AND –

“Barrington Irving Will set the stage for the conference making the case for STEM education as a path for students’ pursuit of STEM careers.” 

Note that attendance to the all day virtual conference costs $99 to non-NSTA members and $79 dollars for members. You can read a description of the conference and see the agenda for the day that begins at 10 am Eastern Time and continues until 6 pm Eastern Time.

Learning is messy!


Two New Updates on the “High Hopes Project”

I got to spend some time today at Cottonwood Elementary School. Students and teachers there are tackling a few of our engineering challenges. I took some photos and wrote a post about the bio-engineering inquiry they are performing over at the High Hopes Project Blog. It’s called “Decomposing Third Graders” or “I saw Third Graders Decomposing At A School Today” – check it out.

Also we shared a post about how just one of the collaborative aspects of this model STEM learning project works – it’s titled: “Just One Collaborative Aspect Of The High Hopes Project” – check it out as well!

Learning is messy!!

Learning Arduinos to Use Arduinos

Just posted about the work going on with the middle school students that are designing the “High Hopes” release mechanism, a  solar panel monitoring system and possibly other systems that will utilize Arduinos. But first they have to learn how … and they’re learning to utilize them with model rockets first! Go check it out. Great messy learning!

Learning is messy!

The “High Hopes Project” Explained

This is cross posted at the “High Hopes Project” blog
Lake Tahoe to Pyramid Lake from about 29,000 meters (95,000 feet)

The “High Hopes Project” is designed to be a model global STEM learning project. But what is it really and how does it work? Who is involved? How can my students and I be involved?

Last year we dropped GoPro cameras 45 feet deep in Lake Tahoe and pulled them up to almost 30,500 meters (100,000 feet) attached to a high altitude weather balloon to investigate how that would work. No students were involved in that trial.

Well that has changed. We (see below) are planning launches from several Reno and Fernley, Nevada, area schools this spring. Tentative dates are the last week in April, and from crystal clear Lake Tahoe in June. These launches will include payloads designed by local students. At least 2 of the payloads will carry the “High Hopes” of the world to near space and release them. Teachers and their students (that’s you!) can participate by writing and submitting your “High Hopes via a Google Spreadsheet or via Twitter.

We are collecting “High Hopes” for your school, community and the world, from students and others around the globe – we’ve already received hundreds from local students, but also students from as far away as Norway and France.

Here are more specifics about the project including ways for you or anyone to join in:

Sparks High School students are designing and building a water pressure gauge to track water pressure from 45 meters (150 feet) deep in Lake Tahoe to the surface. An air pressure gauge will monitor air pressure to 30,500 meters (100,000 feet) or higher. Students from around the world will be invited to research to determine what will happen to the water and air pressure during flight, and we will share the data we bring back so they can assess their understanding.

Sparks High Students are also challenged to engineer a way to reel in the 45 meters (150 feet) of line with the cameras and water pressure gauge up to the bottom payload. Leaving the cameras dangling far below could cause instability during the flight, so this is an important engineering problem to solve. The students also designed the actual payloads to carry the “High Hopes” of the world up to 30,500 meters (100,000 feet), and then release the tiny strips of paper they will be printed on to spread in the atmosphere – Now they’ve turned those payloads over to Sparks Middle School students to install the release mechanism they are designing.

Sparks Middle School students will be learning about writing computer code and designing a system utilizing Ardunio micro-computers.  They will conduct low altitude tests using model rocketry to determine an effective way of accurately measuring altitude using the Arduino system and then use the knowledge gained from these tests to design a system to release the high hopes of the world at at least two different altitudes as the balloon is in flight.

Students at Cottonwood Elementary in Fernley (a K-4 school) are designing special high hopes to glide or helicopter to the ground – these high hopes will be launched at a lower altitude, around 6100 meters (20,000 feet) so the atmosphere is thick enough for them to take flight. They will also perform experiments utilizing bio-engineering to find a substance to treat the paper with so it decomposes as fast as possible once the “Hopes” hit the ground. The elementary students will utilize their new blogging skills and other means to encourage everyone to submit their “High Hopes.”

One payload will include colorful party balloons inflated to different sizes. We challenge students everywhere to research to determine what will happen to them as they rise through atmospheric layers to 30,500 meters (100,000 feet). Onboard cameras will record what occurs and we will share the photos/video obtained so students globally can see what transpired. In addition, we will monitor temperature and other data during the flights and share that data as well.

The High Hopes Project is planned as a model global STEM (Science, Technology, Engineering and Math) project so teachers, students and the community are better educated in the powerful learning a quality integrated STEM approach provides. There will be creative writing ideas, math and more offered along the way. These lesson ideas and challenges will be linked on our project Wiki page. Check back often to see new information and challenges.

You Can Participate too! Teachers and students (really anyone!) can participate by: 1) Brainstorming, writing and submitting their “High Hopes” for their school, community and the world. 2) Participating in the science, engineering and math challenges we offer. 3) Follow our progress via the various social networks we are utilizing to inform and include the world (see links below).

There are other aspects of this project that are developing and we will share later as well.

Additionally, we have partnered with the University of Nevada, Reno, Mechanical Engineering and Materials Science Departments. They are experts in launching high altitude balloons, but are also encouraging undergraduate and graduate level engineering students to work with and mentor students at Sparks High School, Sparks Middle School and Cottonwood Elementary School.

This is a collaborative project between Nevada’s Northwest Regional Professional Development Program, the 21st Century Division of WCSD, the Lyon County School District, the Washoe County School District, the University of Nevada, Reno,   and students from around the world.

Here are links to our online resources – this is how we are modelling the “T” part of STEM – these links will also provide you much more specific information about the project:

Our blog: http://highhopesproject.edublogs.org

Our Web Site: http://highhopesproject.net

Our Twitter page: https://twitter.com

Our Flickr page: https://www.flickr.com/photos/127331960@N04/sets/

Our YouTube Channel: https://www.youtube.com/channel/UCM6JGyKhW2OXYiY9gh3J-Lg/videos

Learning is messy!!!

Balloon Inquiry: What Will Happen And Why?

This was originally posted at the High Hopes Project web site.

Note the 4 party balloons that all started out the same size before they were inflated, on their way to 30,500 meters (100,000 feet ) from a balloon flight last year. On our upcoming flight we will inflate 4 of the same size balloons – the first balloon will be inflated to about 1/4 of its capacity (like the yellow balloon in the photo), the second balloon to about 1/2 of its capacity (see the green balloon above), the third to about 3/4 its capacity (Note the orange balloon), and the fourth balloon will be inflated close to full (Note the red balloon above). What will happen to them during the flight? What are the characteristics of the atmosphere that may effect them and what, if any, will that effect be? Explain your conclusion.

When we launch the “High Hopes” high altitude weather balloon we will include this experiment. We will have a camera recording what happens to the balloons and share those images with you after the flight in late April or early May 2015. So do your research about our atmosphere, discuss with your collaborators, do some heavy thinking, then write what you think will happen. You could even leave your written thoughts here as a comment if you’d like.

Learning is messy!


Now You Can Submit High Hopes For The World With Twitter!

NOTE: This post was originally posted on the High Hopes Project Blog:

When we launch our balloons to 100,000 feet (30,000+ meters) this spring, the world’s high hopes will go with them. Now we’ve made it even easier to submit a “High Hope” using Twitter. Just “Tweet” your “High Hope” for the world, include the hashtag #hhpstem – and we’ll get it and include it in a payload that will take it to near space and then release it to spread around the world. So your “High Hope” will really go high!

We suggest however that having your students write their “High Hopes” for their school, community and the world might need more than 140 characters so then, as we shared in our last post:

“When we first designed the “High Hopes Project” years ago, we went about making sure it stressed not just the powerful content writing experiences about the science and engineering, but the creative writing we knew it would motivate students to engage in. We’ll share more of those along the way, but having students brainstorm, discuss, and share what their “high hopes” are for their school, community and the world turned out to be gold. Most students (maybe adults too) just don’t think about what can and could be.

Originally we had our students write those three “hopes” … school, community … world. We posted general steps, but we have no strict rules about how you submit your “Hopes.” They can be just be one “hope” per student … a “class” hope that the class develops … it is up to you. “Hopes” could also be written as a poem or short story. Once done, you submit them here.”

Either way is fine, you decide. But you just might want to send your own “High Hope” to us quickly through Twitter … and now you can! Remember the hashtag #HHPSTEM  – you can even send more than one!

Learning is messy!

Making and Taking Flight

When experienced using a truly integrated approach, STEM learning is, I believe, the most powerful language arts program there is. The reason so many still struggle with STEM is that they approach it as an “add-on” … something else they have to make time for instead of embracing it as a culture. Yes, it takes time to cultivate that culture where students have learned to work together to solve problems and make things. It also means changing how you run your classroom and you have to give up, at least some of the time, the siloing of subjects and your daily schedule.

Unfortunately, demonstrating and providing experiences for teachers that include even a smattering of the possibilities during a 75 – 90 minute presentation is quite possibly impossible. But we keep trying to do so because we keep being asked to. My boss wants me to set up some 16 hour classes next school year (I’m already overbooked for this year) that will provide more time to experience what that is like from the student point-of-view, so that is definitely on my radar for next year.

Yesterday we were asked again to do our best to make that connection between ELA and STEM at the local Reading Conference for teachers. Here is how we went about it:

We believe it is key to have teachers learn their ABC’s. Not as in the alphabet, but as in Activity Before Content. So we began with an activity. The science reading our students (actually the teachers in our session) would take on was about flight and specifically dealt with lift, drag, thrust and gravity. We did not front load the vocabulary as is common practice, instead we used the activity to give them schema.

We passed out a balsa wood prop plane to each group of 3 to 4 teachers and instructed them to put them together. We gave no other instructions.

We noted that every group actually read, discussed and followed the directions on the package! 🙂

Once finished, teachers were asked to discuss and write about the construction experience, then what ways their plane could be “adjusted” to achieve the longest flight possible. We had them share a few of their answers but made no comments on whether their ideas would truly make a difference. Then we found an empty hallway for the 50+ participants to fly the 18 planes we had passed out. We also gave them a 10 meter measuring tape and had then bring the science notebooks we had them make along, but again, did not tell them what to do with them if anything.

The groups staked out spots to fly and we observed intently.

Most groups decided to throw their planes after winding the propeller rubber band what seemed to be the “right number” of spins. One group launched their plane from the ground because they felt that throwing it wasn’t consistent and could skew the data they were collecting. Then we started to see groups were counting the number of turns of the propeller so that their data would be “more comparable.” Next some were making tweaks to the wing position and so on to achieve a straighter flight and more. So they were discovering things about flight and how their planes functioned through experience, NOT because we took class time to lecture and demonstrate the “right” way.

It was a 75 minute presentation, so that was all the time we had for flying. We returned to class and had them journal about their experience for 3 minutes or so and then did a quick debrief. During our discussion it was noted that these planes are not a perfect way to do inquiry science/engineering because there is no way to control all the variables. Even if you wind the propeller the same number of turns each time the way the rubber band winds up is different and could effect the flight. releasing the plane if you give it a toss is problematic because you can’t be sure you gave it the exact same toss and released it at the exact same angle. When it lands (usually crashes) the wings and tail get moved … did you put them back exactly where they were the last time? Launching from the ground is easier to control overall, but did you let go of the propeller and the plane at the same time and way each time …. and more … you get the idea. So this is a great and motivating way to teach the steps of doing inquiry, but just realize the data produced is slightly unreliable at best.

Note that if you did this activity in your classroom, what we did during the presentation would be how you would introduce the activity. You are just letting students have time to become familiar with how these things work. Next you would get into why this isn’t a perfect inquiry piece but ask them for ways to control the variables as best as possible so we can learn how to get the longest, straightest (or whatever you and they decide to learn about – maybe all of these and more). Perhaps you would agree to launch from the ground behind a line. Do you measure to where the plane ended up, or mark where it first hit the ground? All these decisions lead students to understand how inquiry is done … let them figure it out as much as possible with you playing the role of “reluctant guide” – only helping with advice or opinions when you judge you just have to to move things along. HAVE students take photos, video clips, take notes … even though they will balk at that to keep making flight after flight …. solid science and engineering require descriptive note taking and data collection.


Next we handed out some leveled science readers that had the same article about flight, with the same illustrations and charts, just written at different reading levels. Teachers were then instructed to read the article closest to their grade level (K-1, 2-3, 4-6, 6-9 or so) and take notes on the connections between their activity and what they learned from the reading. When they shared out teachers mentioned how the vocabulary was more interesting and meaningful to learn about because they had experienced them during the activity ( lift, drag, thrust and gravity). In addition because the article was about a flight around the world in a propeller powered plane they understood more of the issues the main character had experienced … and they were just more motivated to read it period because they had assembled and flown their own plane.


We quickly made the point that what they had just experienced in 40 minutes would easily be 1 to 2 weeks in the classroom with all the flights, data collection, journaling, creative writing possibilities, analyzing the data in math, re-enginnering to achieve longer or straighter or finding out what the “best” number of turns to put on the rubber band is and on and on. Imagine connecting with another class anywhere in the world doing the same inquiry and sharing data and discussing results and stories of the good, bad and ugly of what happened during all the flights. How could you bring art in? History? Guest speakers?

We next shared some of the connections to the Next generation Science Standards and shared some other resources and our time was up.

Learning is messy!!