Nevada STEM Underwater and Aerial Vehicle Computer Science Institute

I shared on Twitter not long ago, “The good news is I got a grant! The bad news is I got a grant!” There is too much truth in that dichotomy, but in spite of all the extra work and rules and policies and bids and other “red tape” to be dealt with to purchase the supplies and organize the classes … this is an awesome opportunity for all concerned.

The grant requirements demanded a focus on middle and high school teachers and students, computer programing, and a STEM learning emphasis. You’ll note by the name of the grant (see the title of this post) that the grant department folks that helped in editing, implored me to mention as many aspects of the program as possible in the title.

The choice of underwater and aerial vehicles was an easy one … Nevada has been designated one of 5 states where regulations about drones have been eased to encourage research, testing and innovation in drone use (the fact that Nevada contains huge expanses of open land and 4 seasons of weather may have helped). In addition, with the emphasis on encouraging students to study computer programming … and the fact that these vehicles can be programmed … using drones in class to motivate students to engage in both seemed like a perfect match.
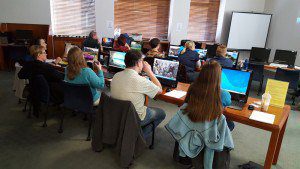
CgDx3-2UAAMh6Et24 teachers, 2 middle school and 2 high school teachers from each of the 6 school districts I serve will be chosen to participate. We will start by doing 2 days of computer programming and 3D modeling utilizing the ncLab online course guided by its developers (a local startup company). Just enough to get teachers started in programming, but also to acquaint them with the online course since it will be available for them and all their students for the next year. I felt that if teachers had even some experience with programming and the online course they would be more likely to use it with their students. Students will have access to the course at school, but also at home or anywhere they can get online, so they can go as far as they like.

Each teacher will receive a Parrot Minidrone Rolling Spider – the kind you control with your phone or pad device, and a waterproof (to 10 meters) and drop proof (from 1.5 meters) digital camera to archive their learning in the institute and student learning in their classrooms. ParrotMiniDrone
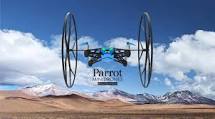
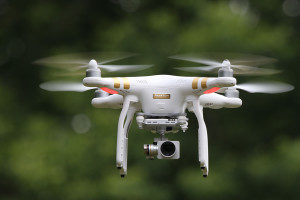
Next, teachers will spend 3 days learning about aerial vehicles from Kirk Ellern (a former high school physics teacher) at AboveNV – a local startup. They’ll fly their “Parrots” and learn how to program them (after the institute they’ll have 4 sets of 10 Parrots they can check out for use in their classrooms). After that introduction to aerial vehicles we’ll move on to Phantom 3 Advanced drones. Here we will put the programming we learned (and note what we want to learn more about) in the ncLab course to work. Four sets of three Phantom 3 drones will be available for checkout by participating teachers forphantom3-drone-300x200 use in their classrooms.
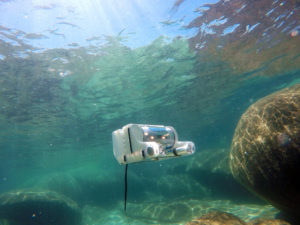
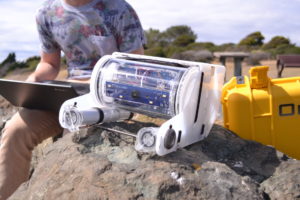
The next 5 days of class will be spent partially assembling and utilizing OpenROV 2.8 underwater vehicles. “Maker skills” will be emphasized as teachers will be taught soldering, wiring, gluing and more to prepare the vehicles for use.  6 OpenROV 2.8’s will be available for checkout by participating teachers. The 2.8’s are operated using a laptop and tether and are capable of depths up to 100 meters. They come with a camera – video/photos and sound can be recorded on the connected laptop … there’s even room for small payloads for doing research – another opportunity to use those computer programming skills as well. Alex Forrest from the Tahoe Environmental Research Center and the University of California, Davis, will lead this portion of the class. Alex has done research in Lake Tahoe utilizing those big “torpedo sized” vehicles you’ve probably seen on the news. He is just back from 3 years in Tasmania.

OpenROV 2.8 Underwater Vehicles

DCIM100GOPROGOPR7566.

DSC_0243


Throughout the school year the course instructors, all specialists in their fields, will be available to consult teachers, visit classrooms and provide follow-up instruction – to me this is a key component of the grant.

Field trip buses will be paid for so participating teachers can take their classes to a water source (lake, pond, wetland, river/stream pool) to operate and do research with the OpenROV’s.

The institute should start up in August and the initial classes will be done by October. I’ll post updates here. I’ll also set up YouTube/Flickr/Wiki and other accounts to archive our progress.

Learning is messy!

DeLaMare Science and Engineering Library

Maker and Collaboration Space

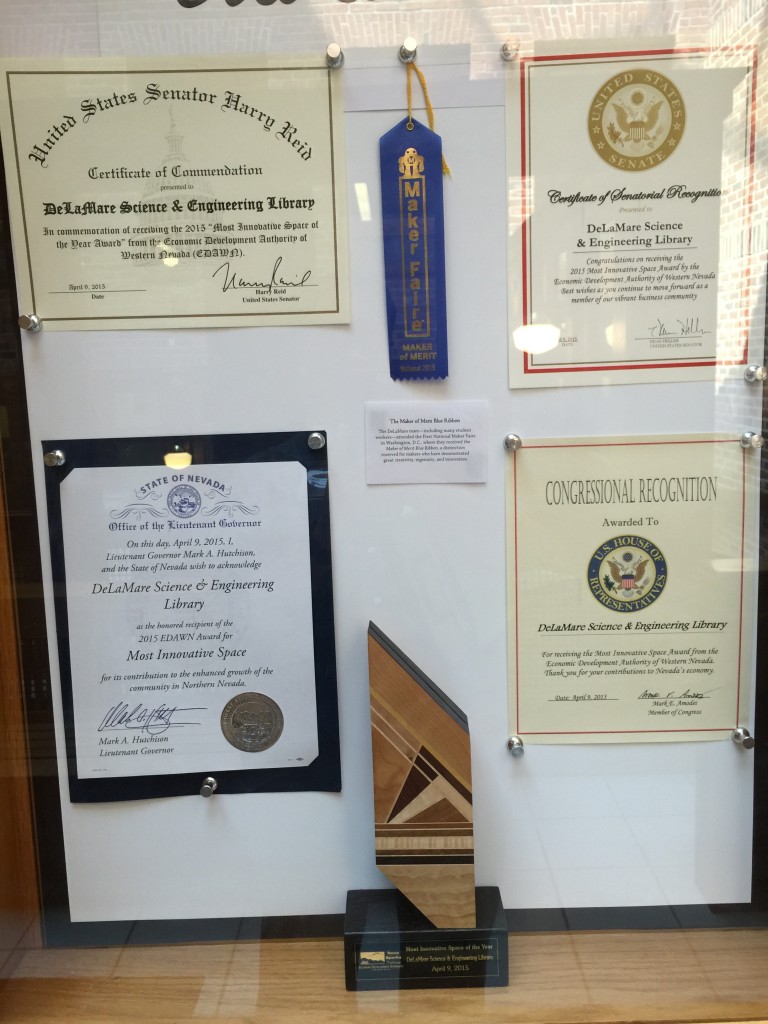
Last week I was part of a small group that was given a tour of the award winning DeLaMare Science & Engineering Library on the campus of the University of Nevada, Reno.

IMG_4008


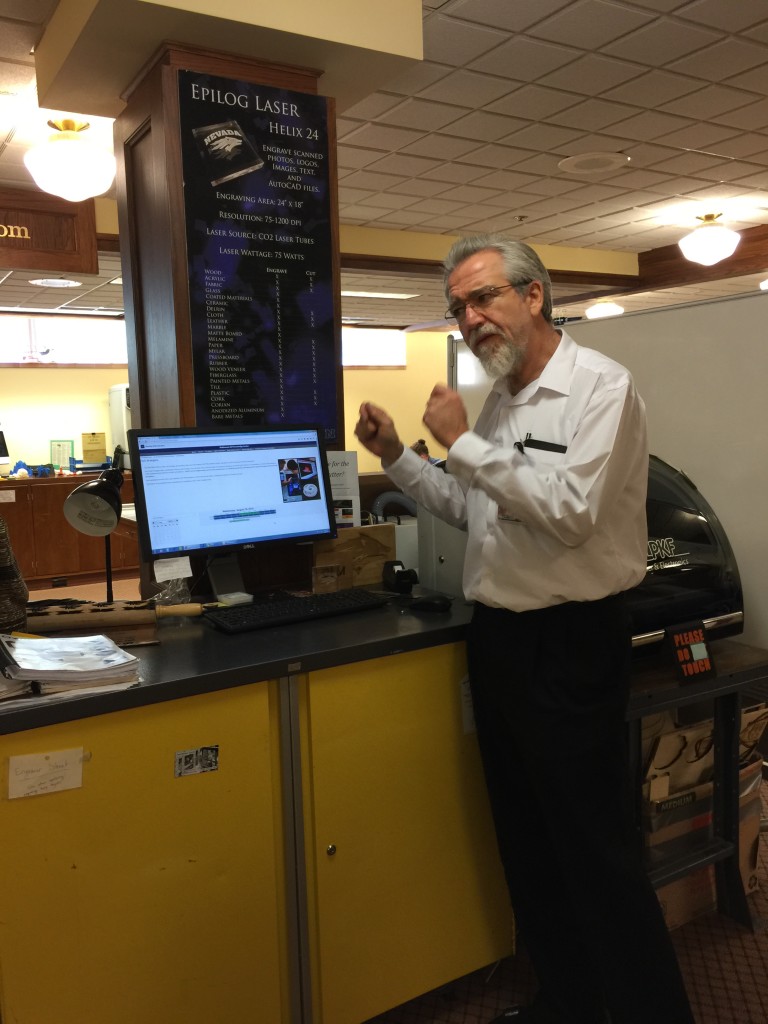
Todd Colegrove,  head of the DeLaMare Library, took the time to show us around.

IMG_4012

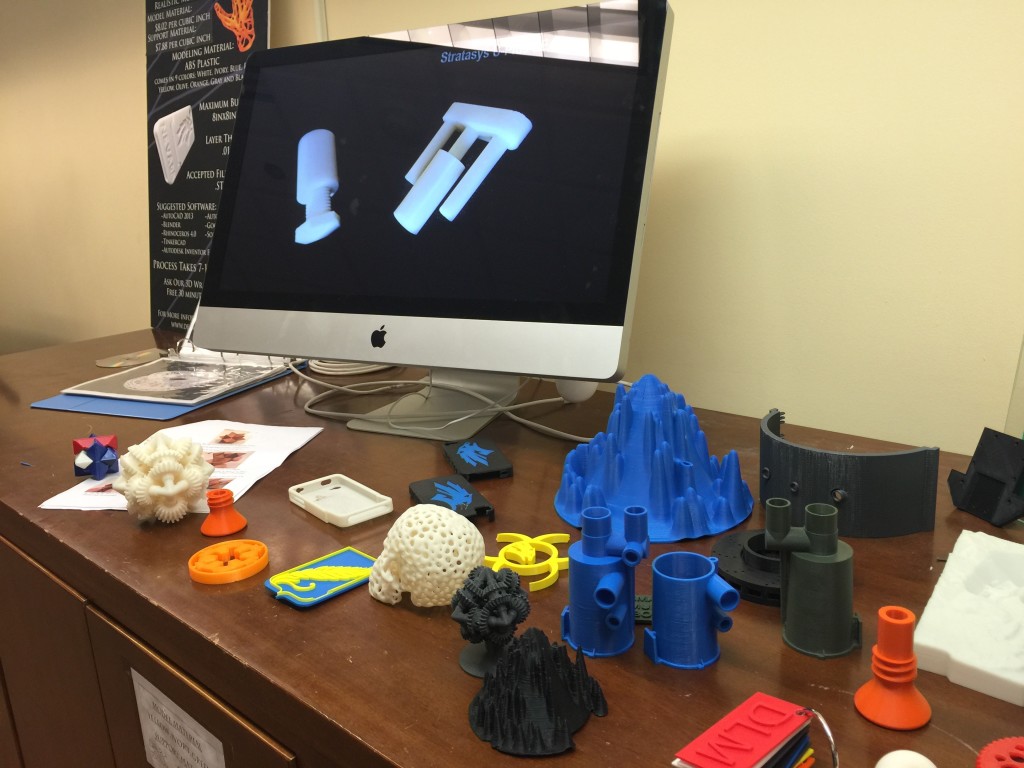
We saw laser cutters, 3-D printers, large format printers, Lego Robotics, Arduinos and many more resources which they will not only allow teachers and students to use, they have people ready to help you learn about and use them. Since they are a no-profit they will also print your 3-D designs for cost.

They also have collaboration rooms, many that have walls made of whiteboard material, tables, chairs, computers and more, that can be checked out and used. They also support classroom field trips to the facility that be everything from a tour of the facility and resources available, to using the facility to plan and “make” using the library’s resources.

IMG_4013


Here’s a YouTube video that shows the resources and maker spaces they have available:

IMG_4010


IMG_4009


IMG_4014


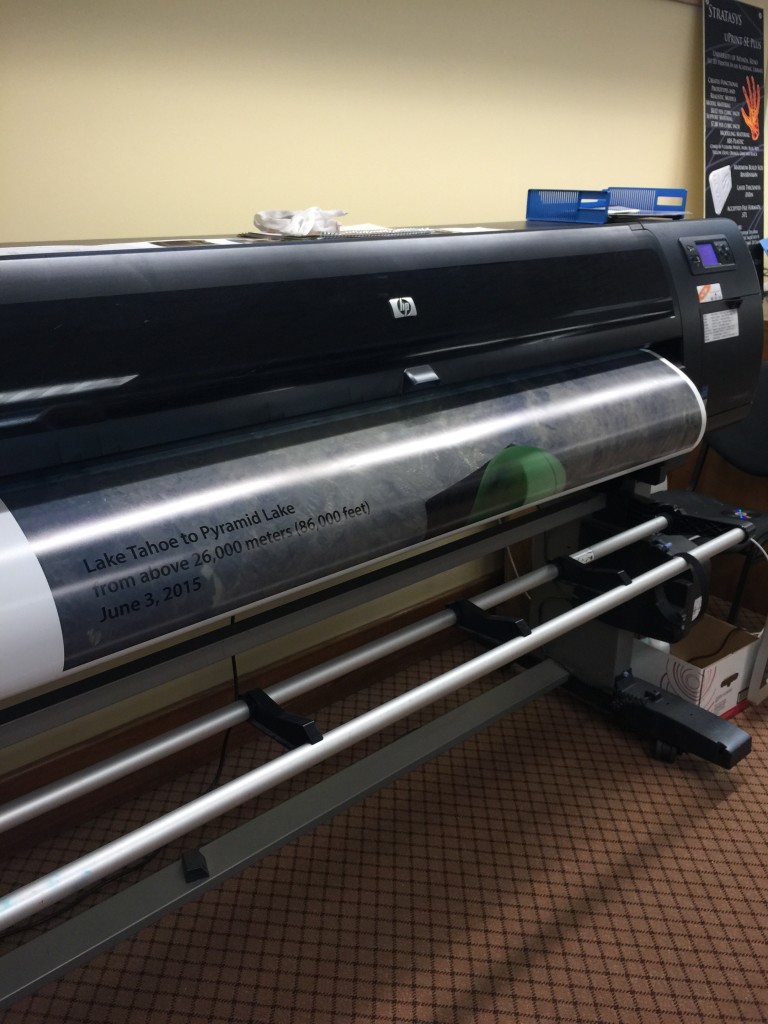
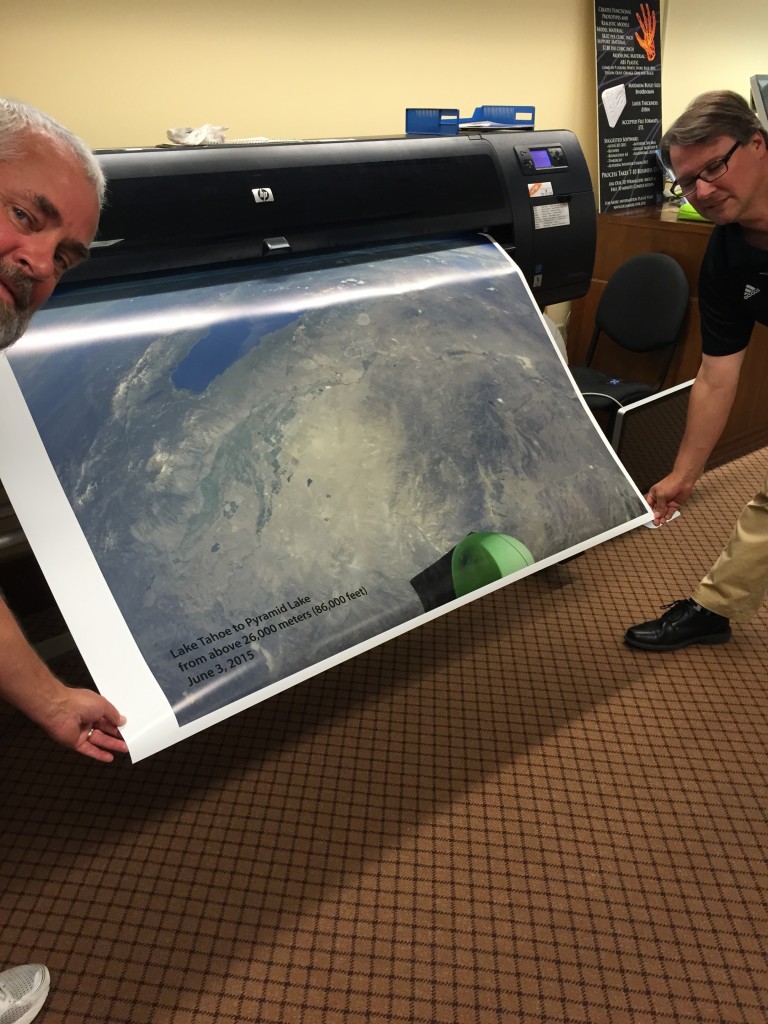
We took advantage of the opportunity to print out in large poster size one of our favorite photos from the “High Hopes Project.”


IMG_4015

We printed on a nice matt paper in 42 x 54 inch size and it cost less than $30.


I’m planning on making a trip to learn about and use the DeLaMare Library as part of classes and trainings we offer to encourage teachers and the community to take advantage of this incredible resource.

Learning is messy!
Why should education leaders embrace digital technologies in their schools?

Why should education leaders embrace digital technologies in their schools? leadershipday2014_01-300x240

1) If you are in a state that adopted the “Common Core State Standards” (CCSS) you really don’t have a choice. There are many (yes many) English Language Arts standards alone that require students as young as kindergarten to use technology to read, produce and publish digital content and to collaborate in doing so. Just a few examples from the CCSS:

K – 12 – Use technology, including the Internet, to produce and publish writing and to interact and collaborate with others.

K-12 – With guidance and support from adults, explore a variety of digital tools to produce and publish writing, including in collaboration with peers.

6th grade – (NOTE: by 6th grade the “… guidance and support from adults …” is gone. 6th graders are to master this standard on their own) Use technology, including the Internet, to produce and publish writing as well as to interact and collaborate with others; demonstrate sufficient command of keyboarding skills to type a minimum of three pages in a single sitting.

5th grade –  Analyze how visual and multimedia elements contribute to the meaning, tone, or beauty of a text (e.g., graphic novel, multimedia presentation of fiction, folktale, myth, poem).

I’m not sure how we get our students to the mastery of these standards, and many others without ubiquitous access to and utilization of the technologies required.

2) Collaboration – This was already stated in the standards above, but those were specifically language arts standards. Communication and collaboration are already key to being educated, but also in getting a job. Learning to collaborate with the student next to you in class or in your group is great, but technology makes it easy (yes, easy) to collaborate globally. Will it be “good enough” if students just learn to collaborate in class? Will that foster solid collaboration skills with today’s (and tomorrow’s) technologies? Not that getting a job is the only reason to learn solid collaboration skills, but getting a job without having those skills is not getting easier. Mastering all the ways collaboration is leveraged personally and using technology is vital.

3) Programming and design – 3D printing (did you know they are printing whole houses, food and blood vessels already?), also –  software development, engineering, graphics, architecture, transportation, art, medicine,  and much more all rely on programming and design skills … this is what is happening now in fields with good paying jobs.

4) Inventing (often referred to as “making” these days) – This is hands on and motivating and requires the skills developed through pedagogy that includes all of the above.

5) Problem solving – (See above)

So you think children are already mastering these skills and technologies on their own by using their smart phones and other technology 24/7? Ok, let’s see how that works out with your students.

I don’t pretend that I’ve included all the reasons that leaders should consider (please add your own in the comments). But these are not easy or cheap changes that have to happen. We’re not going to provide the technology and professional development and commitment to change on the cheap. Only real leadership will get us there.

Learning is messy!
3D Printers – Where Will It End?

I’ve known about 3D printers for quite awhile, but only though news reports and the occasional conversation. So once I got involved in building my own …  then of course they were on my radar and I constantly notice them and hear about them … and acquaintances that have seen mine printing in my cubicle at work are amazed at the whole concept. Not that my printer is much of an example as yet … everything I have printed so far is flawed – not enough heat or printing too fast or ???. It needs adjustment and I need some time and some mentoring to get it there.

IMG_2068


My printer printing out a 3D squirrel.


Here are just a few examples of where 3D printing is heading that have been in the news lately – click on the titles to read more:

Researchers are using 3D printers to make blood vessels

BY JON FINGAS

3d-printed-blood-vessels


[Image credit: Khademhosseini Lab]

From the article:

“There has been talk of printing blood vessels for a few years, but it’s tricky to make tissue that fits the complex shapes of a human body while remaining effective. However, a research team at Brigham and Women’s Hospital may have licked that problem: they’ve 3D printed vessels using a new technique that allows for intricate yet capable designs.”


3D-Printed Food Actually Looks (and Tastes) Pretty Delicious

“Across the pond, in Germany, companies are doing some incredible things with 3D printing. They’re using it to make food. Actual food, like the kind that tastes good.

One of the more successful projects is Biozoon’s Smoothfood, which was developed to print food for senior citizens in retirement and assisted living communities. Those communities have a major need for food that their residents do not need to chew.”


Giant Chinese 3D printer builds 10 houses in just 1 day

3d-printer-4.si


From the article:

“A private company located in eastern China has printed ten full-size houses using a huge 3D printer in the space of a day. The process utilizes quick-drying cement, but the creators are being careful not to reveal the secrets of the technology.

China’s WinSun company, used a system of four 10 meter wide by 6.6 meter high printers with multi-directional sprays to create the houses. Cement and construction waste was used to build the walls layer-by-layer, state news agency Xinhua reported.”

The article/post includes a YouTube video that exhibits the houses and the printer in action.

These represent just a few of the ways 3D printing is being used – they’re even looking into printing food and more in space. What are the implications in education and in our lives?

Learning is messy!


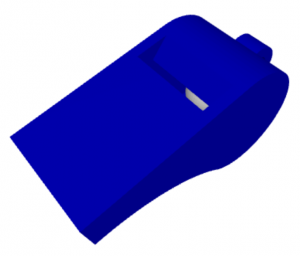
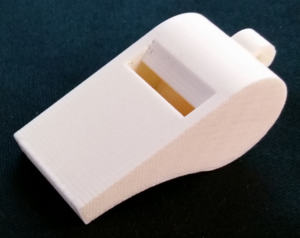
Story of a 3D Printed Whistle

Pavel Solin is an associate professor in the Applied Mathematics Department at the University of Nevada, Reno, and the founder of NCLab, an open public cloud computing platform that provides free web browser access to open source software related to computer modeling and scientific computing. I teamed up with him earlier this year to teach a coding class for teachers ….  well he taught it, I set the class up and took attendance basically.

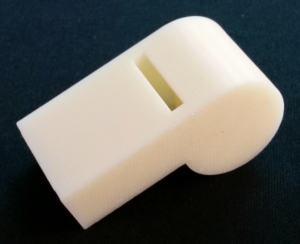
Pavel contacted me this week with a story about elementary students engineering a whistle that might actually work – I’ve cut and pasted his blog post about it below. I am adding video clips of trying the printed out designs. One aspect that amazes me is that the printer prints out the ball inside the whistle … inside the whistle!

I’ve seen many examples of figures printed out on a 3D printer … and they are impressive. Students have to figure out and problem solve coding the design to get it just right. But this is different in that students aren’t just printing out a figure that looks like a whistle, they are using the engineering design process to make a whistle that actually works … hopefully.

Understand that in this instance students were scaffolded along the way by their teacher. I was thrilled when Pavel gave me the 3 whistles to use as examples. I’m really looking forward to trying projects like this once the 3D printer I am building from a kit is finished (2 days from now is the goal!).

 Pavel’s post with my addition of video clips:

Story of a Whistle

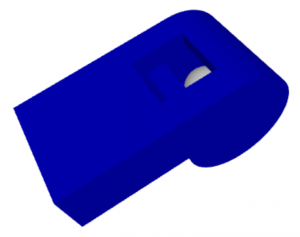
Few days ago, kids from the Schurz Elementary School in Mineral County School District, supervised by Jeremy Elsmore, designed a whistle. I was amazed by the idea of creating something that works. So far, all 3D models I saw were just for display. Here it is. The ball inside the chamber is cool. Once printed, it will remain trapped there forever.
01a

Naturally, the students were anxious to see whether the 3D print would produce sound. Me too.
01b

Click the video link below to see if this whistle design works!


But unfortunately, it did not. The symmetry cutplane reveals that all the air blown into the whistle leaves through the large opening before entering the chamber, and even before hitting the opposite edge.


01c

Second Design

Kids sometimes tend to give up when something does not work. This example can be used to show them that when something does not work, that’s not the end at all. On the contrary – it’s the beginning. To force the air into the chamber, the design was changed:
02a

To better see how the whistle is arranged inside, here is the symmetry cutplane again:
02c

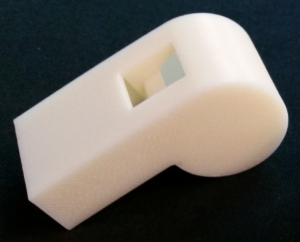
And, this is the 3D print:
02b

Click the video link below to see if the second “re-engineered” design works.


Nice, right? Do you think that it worked? Nope. Argh!


Third Design

The whistle is not a simple thing at all. We googled for schematics of whistles but those we found were not very useful. We also watched several YouTube videos showing how to create a whistle. But all of them were using a different design, without the ball and chamber, based just on a short straight piece of wood. Nevertheless, in all of them, the edge that is hit by the streaming air was sharp. That’s what we did in the third design:
03a

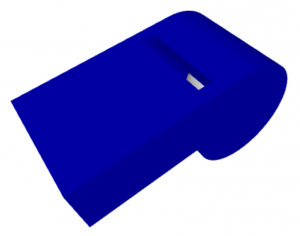
Again, here is the symmetry cutplane that reveals the internals:
03c

And finally, this is the 3D print:
03b

Will the third try be the charm? Click the video to find out:


So what else could be designed and printed that actually is a working product? I already thought up designing a whirlybird design that flies on its own. What else?


Learning is messy!
Even Saturday Afternoon We Are 3D Printer Building

Yes, we we’re back at it today. Not everyone could make it, but there we’re 14 –  3D printers under construction today. A few folks even finished and got theirs printing. Some of us have missed possible work days so we are a bit behind, and next week I’m off to New Orleans for the NSTA STEM Forum and then my daughter’s graduation from the University of Nevada, Las Vegas, so I’ll miss the next 2 work days.

IMG_1942


Today featured lots of soldering:

IMG_1940


And attaching pieces with allen wrenches and lock nuts:

IMG_1943


Ironically, some of the parts we installed today we’re printed on a 3D printer – I placed the pliers in the shot for scale:

IMG_1947


Which when assembled and attached to a motor became a new part:

IMG_1949


Our progress today:

IMG_1948


IMG_1950


IMG_1951


Lots of messy learning today … had to drill out a piece made from aluminum that was not quite big enough to accept a heater core … I can’t show pictures of how we did it … not a good example for safety, holding a piece in my hand while using a high speed hand drill to bore it out – took a half hour at least. A few parts that had to be uninstalled and then reinstalled to get everything to fit just right slowed things down as well.

More in a week or so.

Learning is messy!

What Better Way to Spend A Friday Evening? – 3D Printer Building

Last week I missed the Saturday class and 4 hours of time to work on my 3D printer. Fortunately they offered some extra time Friday night to work. So about 6 of us showed up and spent 3 to 4 hours.

IMG_1926


This all takes place in the University of Nevada, Reno, Engineering Design Lab.


Doug Taylor and I spread out all the parts from our 2 printers – still lots to assemble.

IMG_1927


IMG_1930


Slowly but surely the printers take shape.

As usual the laser cut wood that makes up the bulk of the pieces reeks of burned wood.

IMG_1931


I add 2 more motors, (out of 5 total)  several belts and rollers that snap into their tracks and then make sure each part moves smoothly and easily. And when they don’t, adjustments are made and parts are taken apart and put back together correctly a few times (messy learning for sure).

IMG_1932


The screen is attached and it starts to look more like a 3D printer.

IMG_1933


IMG_1934


This is where I ran out of time today, but back at it tomorrow. Lots of parts left to go, and based on others that are farther along … “lots of soldering … lots and lots of soldering.”


IMG_1936

The prototype was running again today … mocking us it seemed. We’ll get there. 🙂

The prototype of our printer showing off.

The view from the back:

Learning is messy!

I’m Building a 3D Printer – Day 2

A few days ago I posted about being part of a class for teachers and educators where we build a 3D printer and learn to use it and the keep it to use with our students and teachers.

Today we were given the entire 3-4 hours to just get back to work assembling our printers. The group all retrieved their boxed printers and got to it.

IMG_1862


BELOW: What I got done the 1st week:

IMG_1859


BELOW: Most of what still needs to be assembled.

IMG_1861


This printer is mostly made from wood. Wood that has been laser cut into parts … VERY precisely. The burning involved in laser cutting is betrayed by the black edges of the parts as you break them apart during assembly, as well as a hint of burning wood in the room and our somewhat blackened fingertips. Lots of screws and nuts, washers, gears and more are involved.

IMG_1864


We got to a certain point today and the next step meant we had to get the 5 electric motors required:

IMG_1865


As we assembled the frame, which involved installing the first motor, the shape of the printer emerged.

IMG_1867


When we ran out of time today we had a few more parts assembled and ready to add.

IMG_1869


By that point we had also installed the second motor.

IMG_1870


As pieces are snapped out of the laser cut wood lots of these little pieces fall out … are they all unnecessary? Or ??? Deciding keeps you on your toes.


That’s as far as we got today and it might be 2 weeks before I get a chance to work on it some more. We’re told it could be 20 hours of work when tweaking all the settings and getting software setup and all … after today we were about 7 hours in.

BELOW: The printer they assembled to check out the assembly process was busy today printing out gears for a transmission (note the image on the computer):

IMG_1873


Here’s a short video of the printer in action – click the link.

Link to 3D printer video

Learning is messy!

Building My Own 3D Printer

A few weeks back I was invited to participate in a class at the University of Nevada, Reno, where participants would build a 3D printer from a kit and learn how to use it. I jumped at the chance since you get to keep the printer, and I saw the possibilities to take it with me on the road as I travel throughout the rather large region I cover as STEM Learning Facilitator in northwest Nevada.

IMG_1842


The class is being taught by the same mechanical engineering folks that facilitate our high altitude balloon launches (see the TEDxDenverEd video in the right margin of this blog). My colleague Doug Taylor who taught with me for years when we collaborated on those launches and much more is taking the class with me and is building his own 3D printer.

I do not have much of a background in programming unless you count a bit of BASIC I learned 30 years ago or the LOGO I dabbled in with students, so I see this as stretching me a bit as well as providing another resource for the school districts I serve.

IMG_1843


After presenting us with some background on advanced manufacturing we were put into pairs since 2 printers came in each box, and put to work putting them together. The directions are YouTube videos and PDF files you are linked to –  which is a nice combination.

IMG_1844


You can see they crammed 2 printers in each box and there are numerous parts and many are very small. The tools are Allen wrenches, screwdrivers and pliers.

IMG_1845


ABOVE: Everything required to build 2 printers.

BELOW: A finished printer printing gears. This is the instructors’ practice printer – they figured they better go through the process of building one themselves. The printing material is blue plastic – reminds me of the line you use in a yard trimmer, but a bit thicker. You can see the blue spool of material in the upper left of the photo.

These are MakerFarm Prusa 8″ i3 3D Printers – about $600

IMG_1849


BELOW: Some of the parts I assembled our first day.

IMG_1847


IMG_1848


BELOW: And here is what I got done the first day after about 2-3 hours. Finished pieces are on top. Lots left to do. Next class is this Saturday. I’ll try to post our progress.

IMG_1850


Learning Is Messy!